 Bookmark
 Master the art of thick, crispy pan pizza with this Pizza Hut-inspired creation. The secret lies in the butter-greased pan and perfectly proofed dough that creates those signature golden edges and tender interior. You'll get two medium pies ideal for sharing, each topped with zesty seasoned sauce, generous mozzarella, and your favorite toppings. The dough develops incredible flavor during its rise, while high-heat baking ensures that coveted crunch. Perfect for family dinners or weekend gatherings when you want restaurant-quality results right from your kitchen.
Friday nights at our house meant exactly one thing: that glorious grease-spotted cardboard box arriving on the doorstep, the smell hitting you before you even got the door fully open. My brothers and I would race to see who could grab the corner piece with that perfectly fried, crunchiest edge. Last winter, when a snowstorm cancelled our usual delivery ritual, I decided to recreate that magic in my own kitchen. After three attempts and some very willing taste-testers, we cracked the code on that signature crispy-bottomed, chewy-crust pan pizza.
I made these for my kids' sleepover last month and watched six practically silent children demolish both pizzas in record time. One of them actually asked if we'd ordered takeout, which I'm counting as the ultimate compliment. Now they request movie night pizza every weekend, and honestly, I'm perfectly okay with that new tradition.
Ingredients
- All-purpose flour: Forms the foundation of that pillowy yet sturdy crust that can handle generous toppings
- Active dry yeast: The magic ingredient that creates those signature air pockets and chewy texture
- Sugar: Not just for sweetness, it feeds the yeast and helps achieve that gorgeous golden-brown color
- Salt: Essential for flavor development and controlling yeast growth
- Warm water: Activates the yeast perfectly at 110°F, so grab your thermometer for precision
- Olive oil: Keeps the dough tender and adds subtle richness to every bite
- Unsalted butter: The secret weapon for creating that fried-crisp bottom in the pan
- Canned tomato sauce: Provides that consistent, familiar base we all love from childhood
- Dried oregano and basil: Classic Italian herbs that evoke pizza parlor nostalgia
- Garlic and onion powder: Build layers of savory depth without fresh prep work
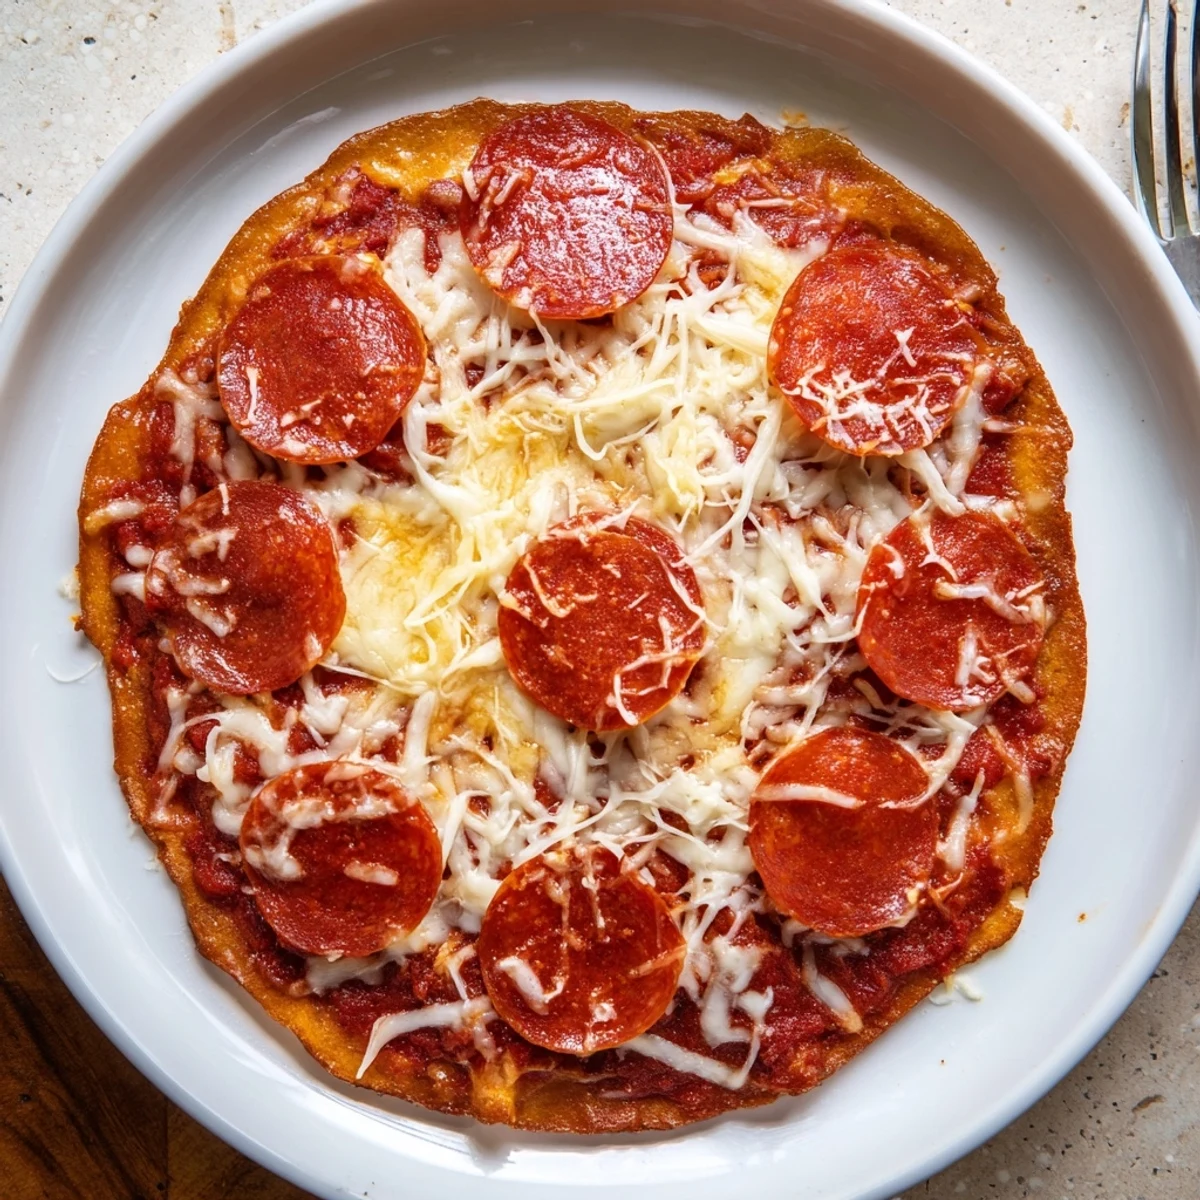
- Shredded mozzarella cheese: Melts into that perfect stretchy, gooey topping we crave
- Pepperoni or preferred toppings: Customize to your hearts content with whatever your family loves most
Instructions
- Wake up the yeast:
- Dissolve the sugar and yeast in warm water, watching it transform into a foamy, fragrant mixture that promises great things to come. Let it bubble for about 5 minutes until it looks like a tiny science experiment.
- Build the dough foundation:
- Combine flour and salt in a large bowl, then pour in your activated yeast mixture along with olive oil. Mix until a rough, shaggy dough forms, then turn it out onto a floured surface.
- Knead with intention:
- Work the dough for 7 to 8 minutes, feeling it transform from sticky and uneven to smooth and elastic under your hands. This muscle memory is what creates that satisfying chewy texture.
- Let it rise:
- Place your dough in a lightly oiled bowl, cover it, and find the warmest corner of your kitchen. Wait about an hour until it has doubled in size, then punch it down gently to release any air bubbles.
- Prepare the pans:
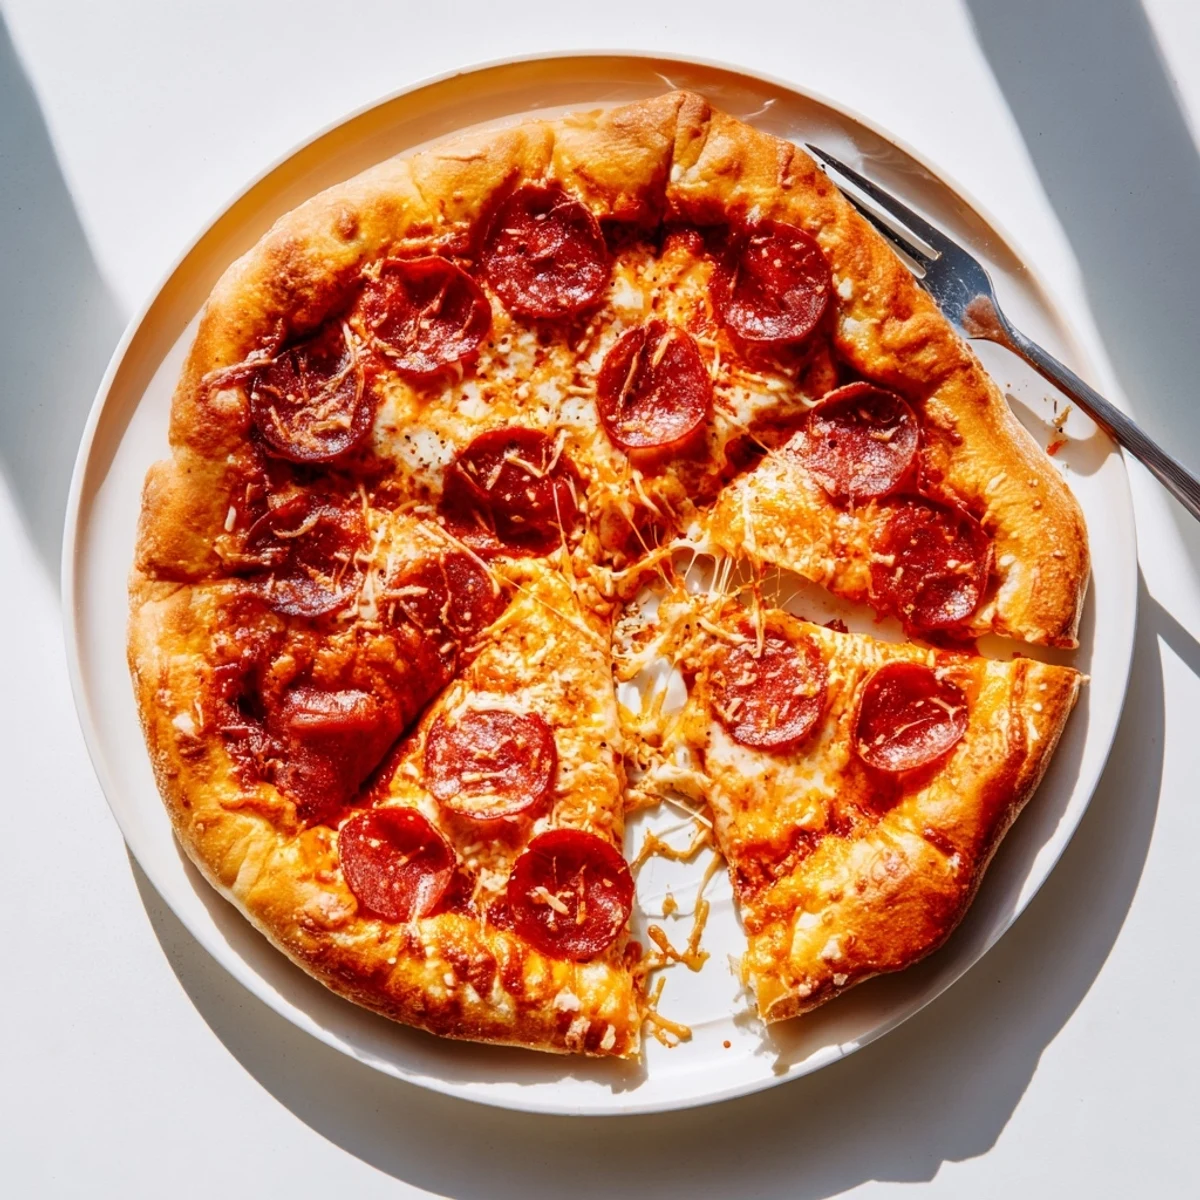
- Generously grease two 9 inch round cake pans with softened butter, then brush the bottom with a little olive oil for extra crispness. This butter step is non-negotiable for that authentic crunch.
- Shape the crusts:
- Divide the dough into two equal portions and press each into the prepared pans, pushing the dough slightly up the sides. Let the dough rest for 10 to 15 minutes while you preheat your oven to 450°F.
- Make the sauce:
- Combine tomato sauce with oregano, basil, garlic powder, onion powder, sugar, salt, and pepper in a small bowl. Let the flavors mingle while you assemble everything else.
- Assemble your masterpiece:
- Spread half the sauce on each crust, leaving a small border for the crust. Sprinkle cheese generously over the sauce, then arrange your toppings exactly how everyone likes them.
- Add the finishing touch:
- Brush the exposed crust edges with olive oil, which will give them that beautiful golden sheen and extra crunch. Slide those pans into your hot oven and bake for 20 to 25 minutes.
- Watch the magic happen:
- The crust should turn deep golden brown and the cheese should be bubbling with those irresistible browned spots. Let the pizzas cool for just a few minutes before slicing, which helps the cheese set slightly.
 Bookmark
 My husband took one bite of this and immediately declared it better than our local pizza joint. We now have a standing Friday night date in the kitchen, stretching dough and arguing over toppings like we're running our own pizzeria. Something about making it together makes it taste even better.
The Art of Pan Selection
Those 9 inch round cake pans are absolutely crucial to achieving the authentic Pizza Hut experience. The straight sides create that perfect thick edge while the shallow depth allows the bottom to fry up beautifully in the butter. I have tried cast iron skillets and even sheet pans, but nothing quite replicates that original crunch like the traditional cake pan. If you only have one pan, simply make the pizzas one at a time, because the results are worth the extra effort.
Temperature Secrets
That 450°F oven temperature might feel aggressive if you are used to baking bread at lower heats, but trust me on this one. The high heat is what creates the contrast between the crispy bottom exterior and the soft, pillowy interior. I keep an oven thermometer in my kitchen because accurate temperature makes all the difference between good pizza and great pizza. The moment you see that cheese bubbling with those gorgeous brown spots, you will know you have nailed it.
Make It Your Own
Once you have mastered the basic recipe, the variations are absolutely endless and limited only by your imagination. The classic pepperoni will always have a special place in my heart, but some of our best combinations came from cleaning out the refrigerator.
- Try a white pizza version with ricotta, mozzarella, and fresh spinach instead of sauce
- Mushroom and caramelized onion create a sophisticated flavor profile that adults adore
- A drizzle of hot honey after baking adds an unexpected sweet heat kick
 Bookmark
 There is something deeply satisfying about pulling that bubbling, golden pizza from your own oven. Friday night might never be the same, and honestly, I think that is a beautiful thing.
Recipe FAQs
- → Why use butter instead of oil in the pan?
-
Butter creates that signature golden-brown crust and adds rich flavor that oil alone can't achieve. The milk solids in butter caramelize during baking, giving the crust its characteristic crunch and restaurant-style appearance.
- → Can I make the dough ahead of time?
-
Absolutely. The dough actually benefits from an overnight rise in the refrigerator. This slow fermentation develops deeper flavor and makes the crust more tender. Just bring it to room temperature before shaping.
- → What type of pan works best?
-
Heavy-duty 9-inch round cake pans or cast iron skillets work beautifully. The weight helps distribute heat evenly for consistent baking. Dark metal pans will create a crisper bottom crust than lighter pans.
- → Why press dough up the sides?
-
Creating that slight edge helps contain the sauce and cheese while giving you those classic Pizza Hut-style handles. It also creates texture variation—crispy edges with a tender, thick center.
- → Can I freeze the dough?
-
Yes, freeze the dough after the first rise. Wrap it tightly in plastic and freeze for up to 3 months. Thaw overnight in the refrigerator, then bring to room temperature before baking.
- → How do I know when it's done?
-
Look for deep golden-brown edges, bubbling cheese that's starting to brown slightly, and a firm bottom crust. The center should feel set when you gently shake the pan.
