 Bookmark
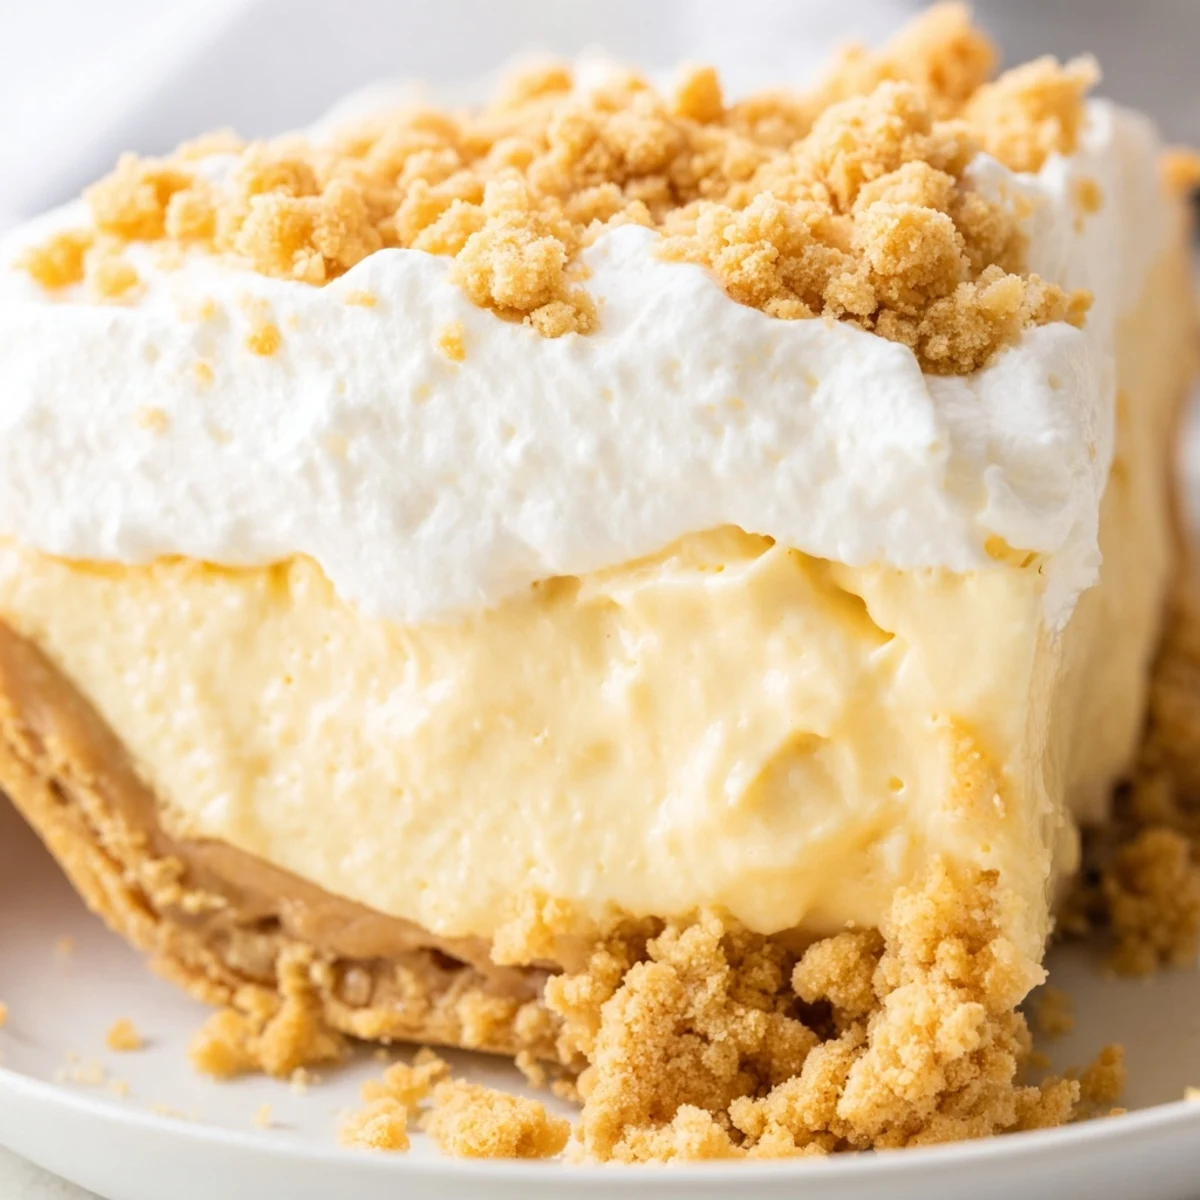
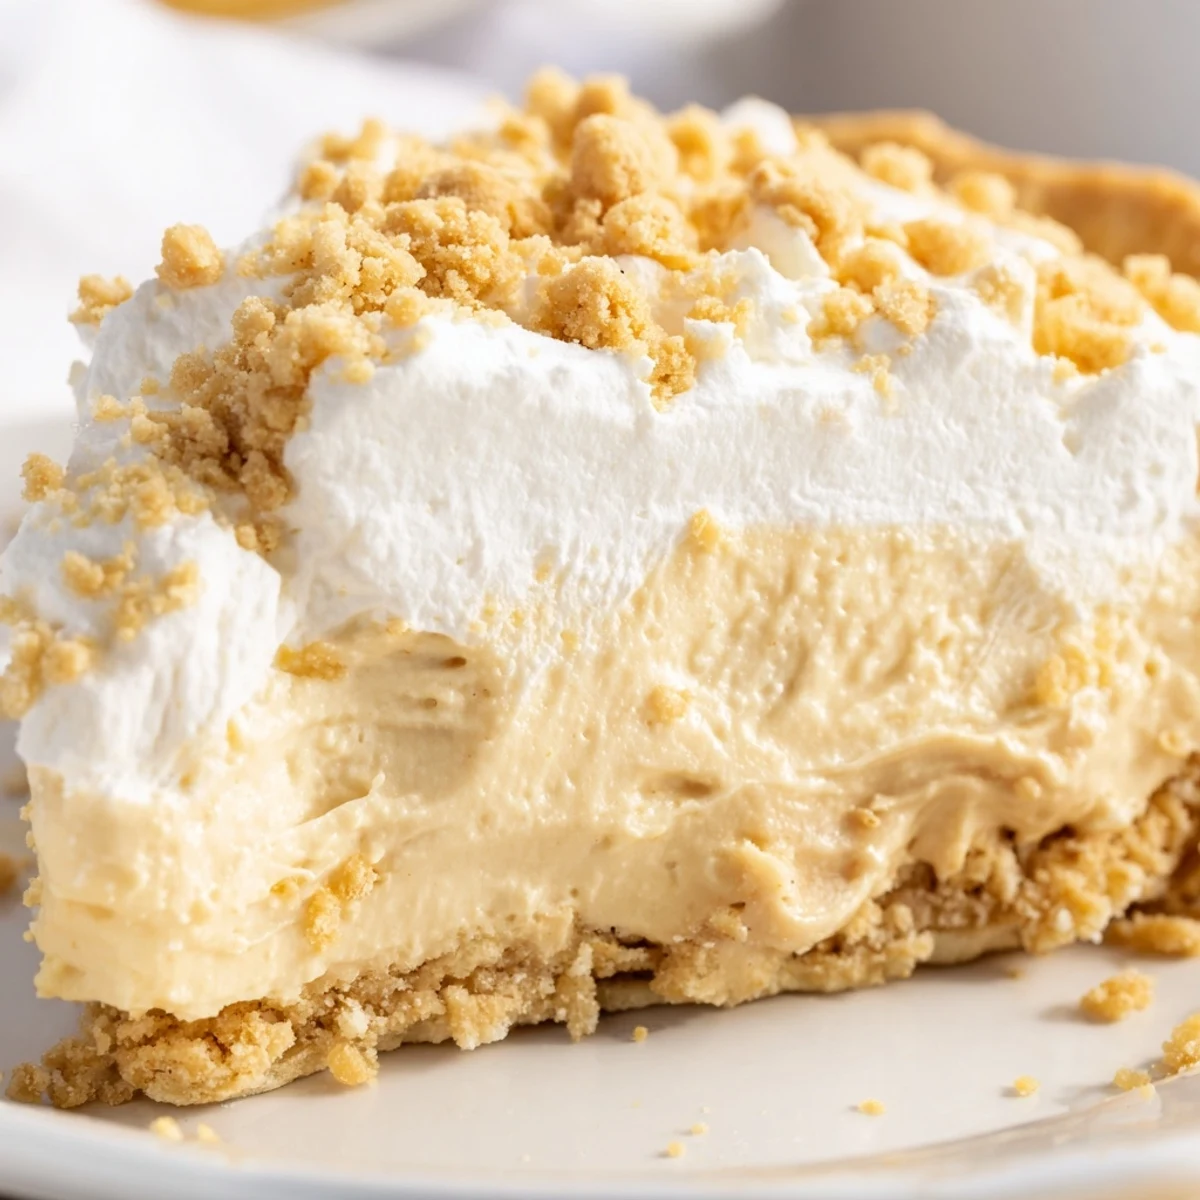
 Indulge in this luscious Amish-style peanut butter dream pie, a beloved American comfort dessert that combines creamy custard filling with rich peanut butter flavor. The velvety texture comes from a homemade custard base infused with vanilla, layered between buttery peanut butter crumbs and finished with sweetened whipped cream. This vintage dessert requires just 25 minutes of active prep time before chilling to perfection, making it an elegant yet manageable treat for special occasions or family gatherings.
The first time I encountered this pie at an Amish bake sale in Lancaster County, I couldn't believe something so simple could taste this extraordinary. The woman behind the table just smiled and said it was her grandmother's recipe, the one everyone requested for church suppers and family birthdays. I bought two slices that day and went back for a third before they closed up.
Last summer I made this for my father in law's birthday, and he literally stopped eating after the first bite, closed his eyes, and said this reminded him of the county fair desserts from his childhood. My sister in law begged for the recipe before she even finished her slice. Now it's the only dessert anyone requests when we host family dinners.
Ingredients
- 1 9-inch prepared pie crust (baked and cooled): Using a store-bought crust works perfectly here, but a homemade graham cracker crust adds that extra buttery note that makes it feel special
- 3/4 cup creamy peanut butter: Don't use natural peanut butter that needs stirring—the regular creamy stuff gives you that perfect crumbly texture
- 1 cup powdered sugar: This sweetens the peanut butter crumbs while helping them hold together when you mix them
- 2/3 cup granulated sugar: The foundation for that silky custard filling that sets up so beautifully
- 1/3 cup all-purpose flour: This thickens the filling just enough without making it taste like flour paste
- 1/4 teaspoon salt: A tiny pinch balances all that sweetness and makes the peanut butter flavor pop
- 2 cups whole milk: Whole milk gives the richest, most velvety filling—low fat milk just doesn't achieve the same luxurious texture
- 3 large egg yolks: Room temperature yolks incorporate more smoothly into the hot mixture
- 1 teaspoon pure vanilla extract: Pure vanilla makes a difference you can taste in such a simple dessert
- 2 tablespoons unsalted butter: Stirred in at the end, this adds that final glossy finish to the filling
- 1 cup heavy whipping cream: Cold cream whips up faster and holds its shape better on top of the pie
- 2 tablespoons powdered sugar: Just enough sweetness for the whipped topping without overpowering the filling
- 1/2 teaspoon vanilla extract: The vanilla in the cream ties everything together beautifully
Instructions
- Make the magic crumbs first:
- Mix the peanut butter and powdered sugar in a medium bowl with a fork until it looks like sandy crumbs—you'll know it's ready when you can squeeze a handful and it holds together loosely
- Layer the bottom:
- Press half of those crumbles into the bottom of your cooled pie crust, creating an even foundation that will surprise everyone with that peanut butter punch
- Start the filling base:
- Whisk the granulated sugar, flour, and salt in a saucepan until combined, then gradually whisk in the milk until you can't see any dry flour remaining
- Cook it slow and steady:
- Set the pan over medium heat and whisk constantly—that's non-negotiable—until the mixture thickens enough to coat the back of a spoon and just begins to bubble
- Temper those yolks:
- Whisk your yolks in a separate bowl, then slowly drizzle in about half a cup of the hot milk mixture while whisking furiously so the eggs don't scramble
- Finish the custard:
- Pour that warmed egg mixture back into the saucepan, whisking constantly, and cook for 2 more minutes until it's thick enough to hold its shape
- Add the finishing touches:
- Remove from heat and stir in the butter and vanilla until the filling is glossy and smooth
- Assemble the pie:
- Pour the warm filling over those peanut butter crumbs in your crust, let it cool for 15 minutes, then refrigerate for at least 2 hours until completely set
- Whip the cream:
- Beat the heavy cream with the powdered sugar and vanilla until stiff peaks form—you want it thick enough to hold its shape when you spread it
- The grand finale:
- Spread that whipped cream over the chilled pie and sprinkle with the remaining peanut butter crumbs right before serving
 Bookmark
 My neighbor tasted this at our summer block party and immediately asked if I'd teach her how to make it for her daughter's wedding shower. We spent a Sunday afternoon in my kitchen making three pies together, and now she texts me photos every time she makes one for her family.
Making It Ahead
You can make this pie up to 24 hours in advance, but I've learned to save the whipped cream topping for the day you're serving it. The crumbs will soften slightly overnight, which some people actually prefer because everything melds together. Just keep it covered in the refrigerator and add that final cloud of whipped cream and fresh crumbs about an hour before serving.
Crust Secrets
While a standard pie crust works perfectly, I've started using a crushed shortbread cookie crust for extra buttery flavor that complements the peanut butter beautifully. Just press about 2 cups of crushed shortbread cookies mixed with 4 tablespoons melted butter into your pie dish and bake at 350°F for 8-10 minutes. The texture difference is subtle but makes it feel even more special.
Serving Suggestions
This pie is incredibly rich, so I always serve it in thin slices with something to cut through all that creaminess. A hot cup of coffee is the classic pairing, but I've also found that a drizzle of salted caramel sauce takes it over the top. The salt plays so nicely with the peanut butter while the caramel adds another layer of sweetness.
- Let the pie sit at room temperature for about 15 minutes before slicing—it cuts much cleaner
- Run your knife under hot water between slices for perfect presentation
- Any leftovers will keep for 2-3 days in the refrigerator, though good luck having any left
 Bookmark
 There's something so honest about a pie that doesn't try to be fancy—just creamy, peanut buttery comfort on a plate. Every time I serve it, I think about that Amish bake sale and how some recipes just become part of your story.
Recipe FAQs
- → How long does the peanut butter dream pie need to chill?
-
The pie requires at least 2 hours of refrigeration time to set completely. For optimal texture and easier slicing, refrigerate for 3-4 hours or until the filling is firm and fully chilled.
- → Can I use crunchy peanut butter instead of creamy?
-
While creamy peanut butter works best for smooth crumbs and filling, you can substitute crunchy peanut butter for extra texture. The crumbs will have a coarser consistency, adding pleasant crunch throughout the dessert.
- → What type of crust works best for this Amish pie?
-
A traditional 9-inch baked pie crust works perfectly, whether store-bought or homemade. For added flavor, consider a graham cracker or shortbread crust, which complements the creamy peanut butter filling beautifully.
- → How do I know when the custard filling is thick enough?
-
The custard is ready when it coats the back of a spoon and just begins to bubble. This typically takes 4-5 minutes of constant whisking over medium heat. The mixture should become glossy and pudding-like in consistency.
- → Can this peanut butter dream pie be made ahead?
-
Absolutely! This pie actually improves after chilling overnight. Prepare it up to 24 hours in advance, keeping it covered in the refrigerator. Add the whipped cream topping and remaining crumbs shortly before serving for the freshest presentation.
- → Why do I need to temper the egg yolks?
-
Tempering prevents the eggs from scrambling when added to the hot milk mixture. Whisking a small amount of hot liquid into the yolks gradually raises their temperature, allowing them to incorporate smoothly into the custard base without curdling.
