 Bookmark
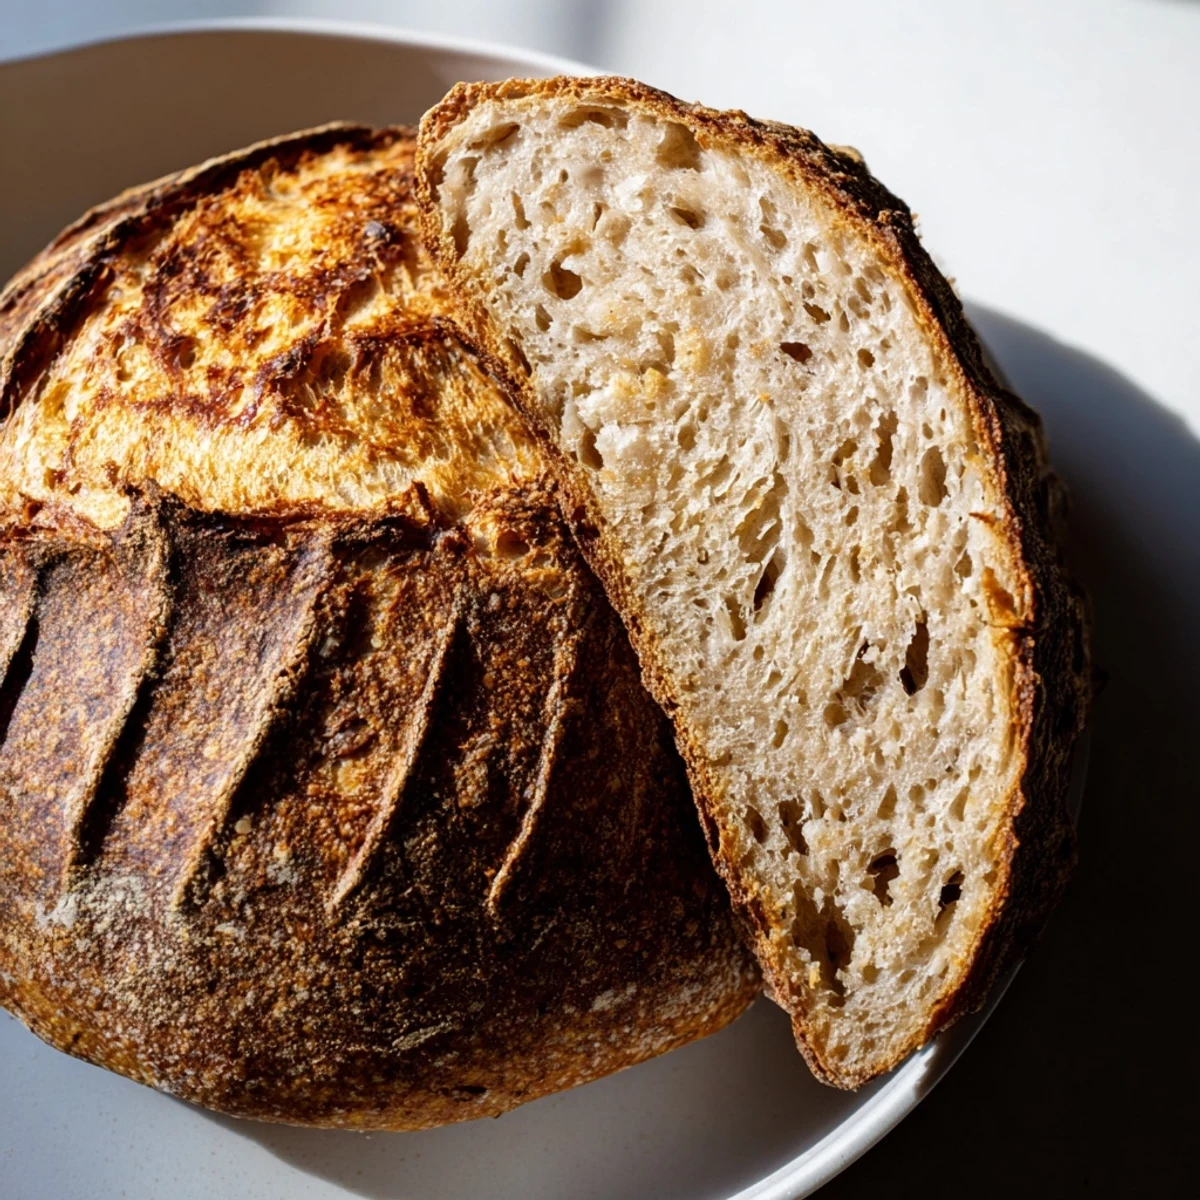
 Craft an exceptional rustic loaf using traditional fermentation methods. This naturally leavened bread develops signature tanginess and complex flavor through wild yeast activity over 12-18 hours. The process creates a beautifully chewy crust and open, tender crumb structure. Perfect for artisanal bakers seeking authentic sourdough characteristics without commercial yeast.
The smell of sourdough baking has this way of taking over an entire house, lingering in corners and making everyone gravitate toward the kitchen. I started my first starter during what felt like the longest winter of my life, and now I can not imagine my kitchen without that bubbly jar on the counter. There is something deeply satisfying about turning flour, water, and time into something that feeds you in more ways than one. Every loaf feels like a small victory against the instant gratification world we live in.
My sister stayed over during her first year of teaching, absolutely exhausted from classroom chaos, and I pulled a fresh loaf from the oven right as she walked through the door. She stood there tearing off pieces, still wearing her coat, telling me this was exactly what she needed. That is the thing about homemade bread, it shows up for people in a way that feels like care without having to say a word.
Ingredients
- Bread flour: The higher protein content here is what gives your loaf structure and that satisfying chew we are all chasing
- Water: Room temperature is crucial because water that is too cold can shock your starter and slow down fermentation
- Sourdough starter: Your starter should be fed within the last 12 hours and doubled in size, full of bubbles and ready to work
- Sea salt: Do not skip this or reduce it, salt strengthens gluten and keeps fermentation from going too wild
Instructions
- Mix your base:
- Combine flour and water in a large bowl until no dry patches remain, then cover and walk away for 45 minutes to let the flour hydrate fully
- Build the dough:
- Add your starter and sea salt, squeezing them through the dough with your fingers until everything feels evenly incorporated
- Let it rest:
- Cover the bowl and let the dough relax for 30 minutes, giving the gluten time to develop before you start working it
- Stretch and fold:
- Perform four sets of folds every 30 minutes by grabbing one side of the dough, pulling it up high, and folding it over the center
- Bulk fermentation:
- Let the dough rise at room temperature for 4 to 6 hours until it has noticeably grown and feels pillowy and alive
- Shape your loaf:
- Turn the dough onto a lightly floured surface and gently fold the edges toward the center to create tension on the surface
- Proofing time:
- Place the dough seam side up in a floured proofing basket and let it proof for 2 to 4 hours until it springs back slowly when poked
- Get ready to bake:
- Preheat your oven to 230°C with a Dutch oven inside for at least 30 minutes so it is screaming hot
- Score and bake:
- Turn the dough onto parchment, slash the top with a sharp blade, and transfer to the hot Dutch oven with the lid on
- Reveal the crust:
- Bake covered for 25 minutes, then remove the lid and let the crust develop deep color for another 20 minutes
- The hardest part:
- Cool completely on a wire rack because cutting into warm bread will ruin the texture you worked so hard to achieve
 Bookmark
 There was this Sunday where nothing went according to plan, the dough spread too thin, the oven temperature was off, and I almost scraped the whole thing into the trash. But I baked it anyway, and though it was not the prettiest loaf, it was still sourdough, still warm, still exactly what we needed with soup that night. Some days the best bread is the bread that actually happened, not the bread you imagined.
Understanding Fermentation
Learning to read your dough is like learning a language without words. You want to see bubbles on the surface and feel the dough become jiggly and alive. The windowpane test, where you stretch a small piece of dough until it is translucent, is a good indicator that gluten has developed enough to trap those fermentation gases. Trust your hands more than the clock.
Building Your Starter
A healthy starter should smell pleasantly tangy, not like acetone or something gone wrong. Feed it at the same ratio consistently and keep it at room temperature if you bake often, or tuck it in the refrigerator if you only bake weekly. The discard can be used for pancakes, waffles, or crackers, so nothing goes to waste while you are building up that microbial community.
Scoring Like A Baker
Your score is not just decoration, it tells the bread where to expand in the oven. Hold your lame or razor blade at a 45 degree angle and cut with confidence, hesitating will give you ragged edges instead of a clean bloom. A simple single slash down the center works beautifully for beginner loaves and gives you that classic bakery look.
- Use the sharpest blade you can find, a dull blade tears rather than cuts
- Dust the surface with rice flour for cleaner contrast and easier scoring
- Score quickly and decisively right before the dough goes into the oven
 Bookmark
 There is nothing quite like the sound of a fresh loaf crackling as it cools on the counter, singing the song of a job well done.
Recipe FAQs
- → What makes sourdough different from regular bread?
-
Sourdough relies on wild yeast and beneficial bacteria naturally present in flour, creating distinctive tangy flavor and improved digestibility. The lengthy fermentation breaks down gluten and phytic acid, making nutrients more bioavailable.
- → How do I know when my starter is active enough?
-
An active starter should be bubbly, doubled in volume within 4-8 hours after feeding, and have a pleasantly sour aroma. Float testing (dropping a spoonful in water) indicates readiness when it floats rather than sinks.
- → Can I shorten the fermentation time?
-
Rushing fermentation compromises flavor development and texture. The extended rise allows proper enzyme activity and gluten structure formation. Warmer environments (24-26°C) accelerate the process slightly, but 12-18 hours remains ideal.
- → Why is the dough scored before baking?
-
Scoring creates controlled expansion points where steam escapes during initial baking. This prevents unsightly tearing and helps the loaf achieve optimal oven spring, resulting in an attractive artisanal appearance with professional-looking ears.
- → What can I use if I don't have a Dutch oven?
-
A heavy cast iron pot with a tight-fitting lid, clay cloche, or even a stainless steel bowl with aluminum foil cover creates necessary steam. Steam during initial baking promotes crust formation and oven spring for professional results.
- → How should I store the finished loaf?
-
Store cut-side down on a wooden board or in a paper bag at room temperature for 2-3 days. Refrigeration dries out bread quickly. For longer storage, freeze sliced portions in freezer bags, thawing as needed.
