 Bookmark
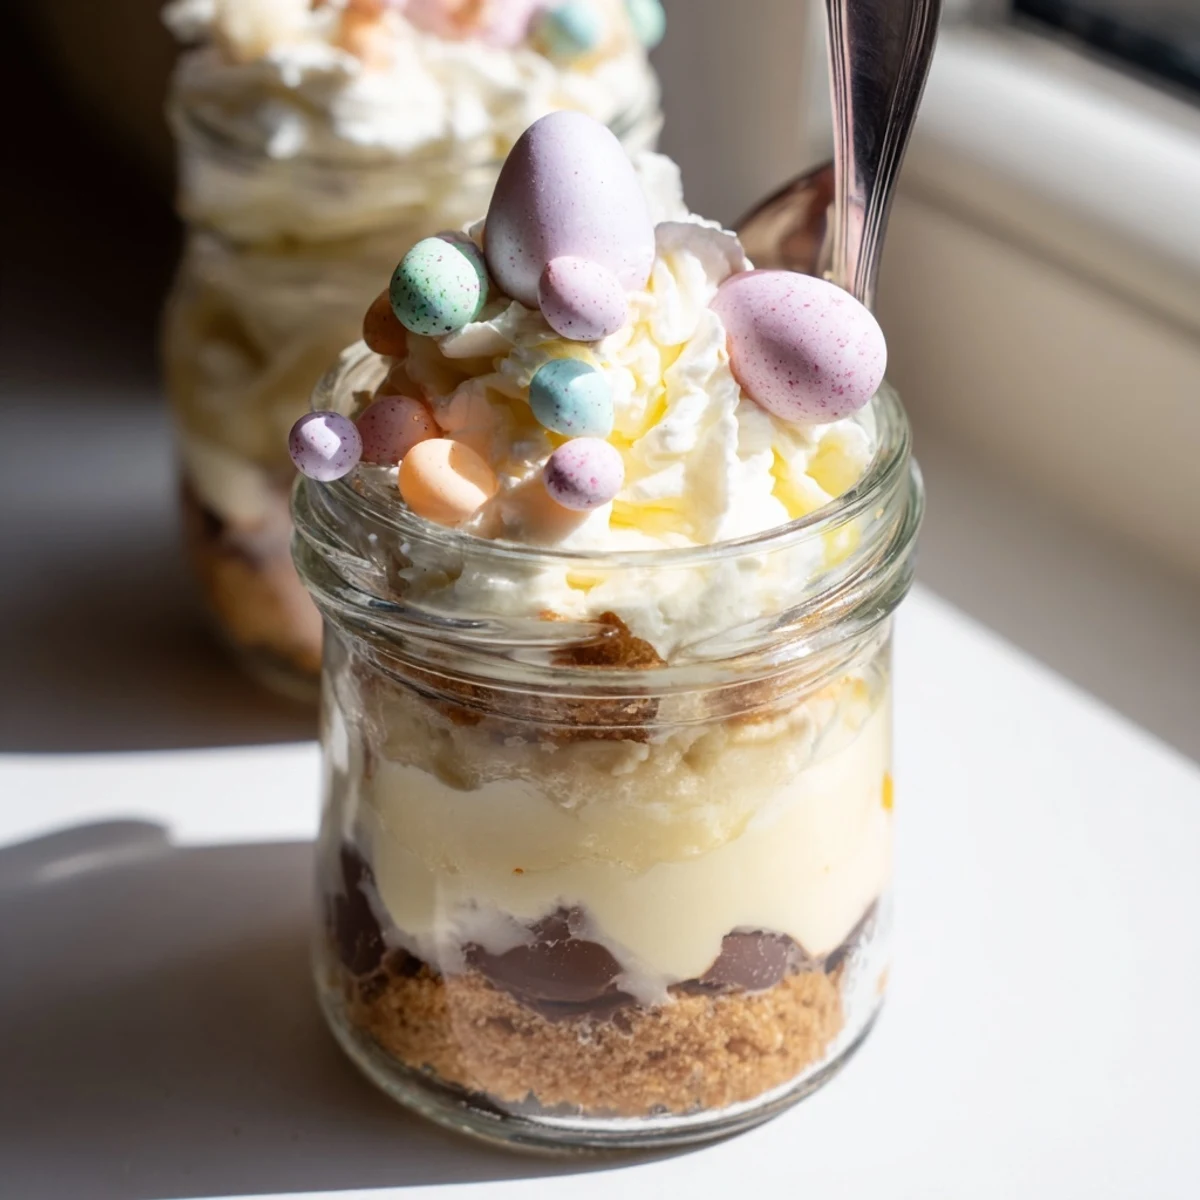
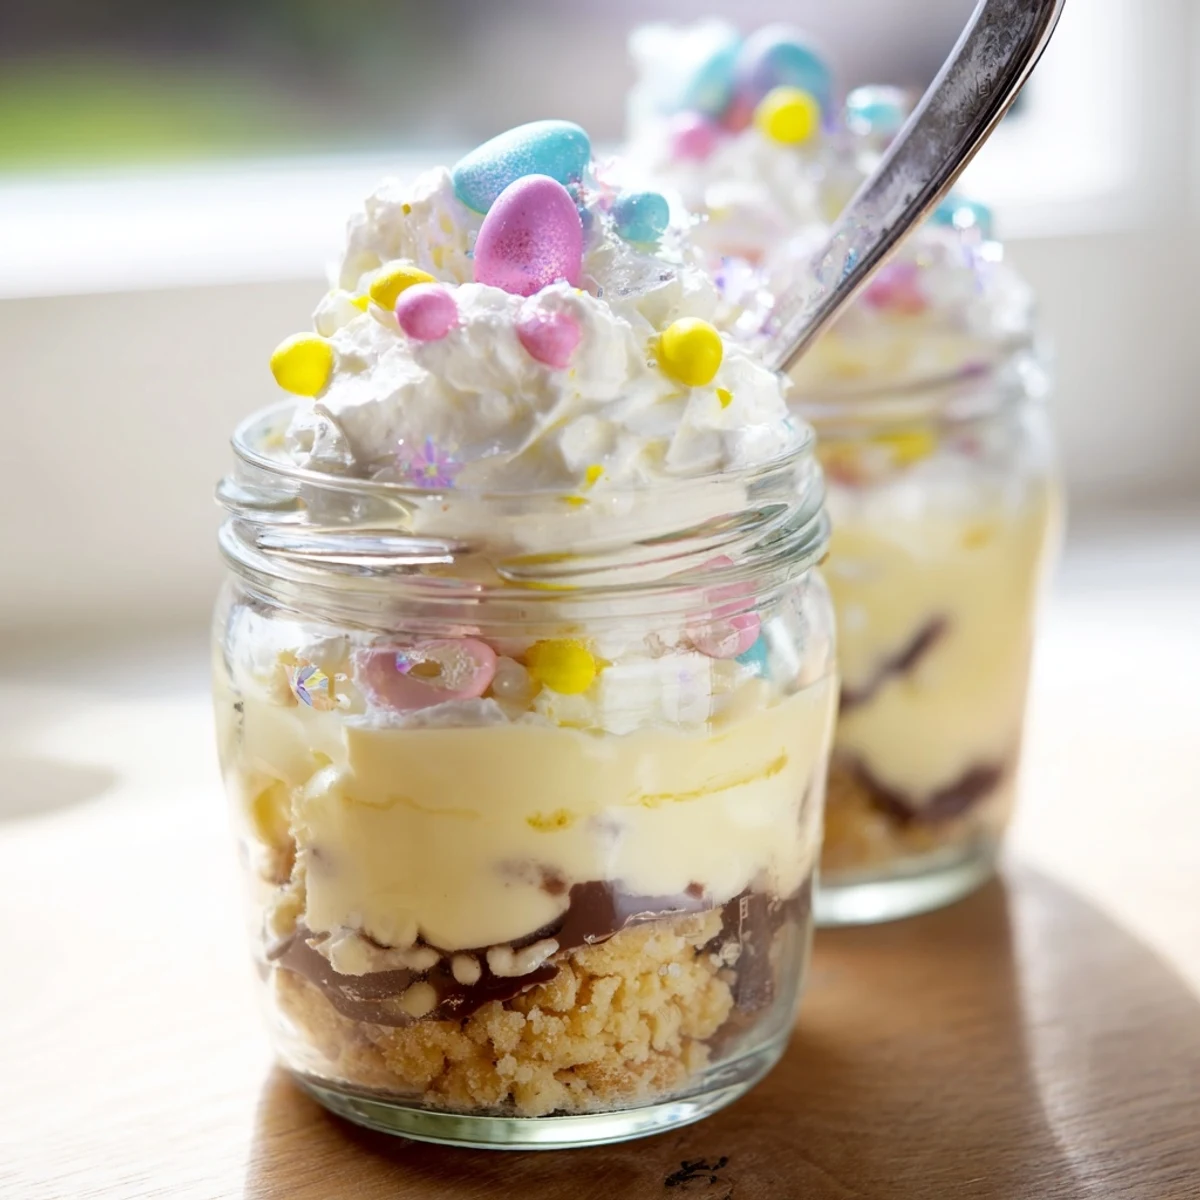
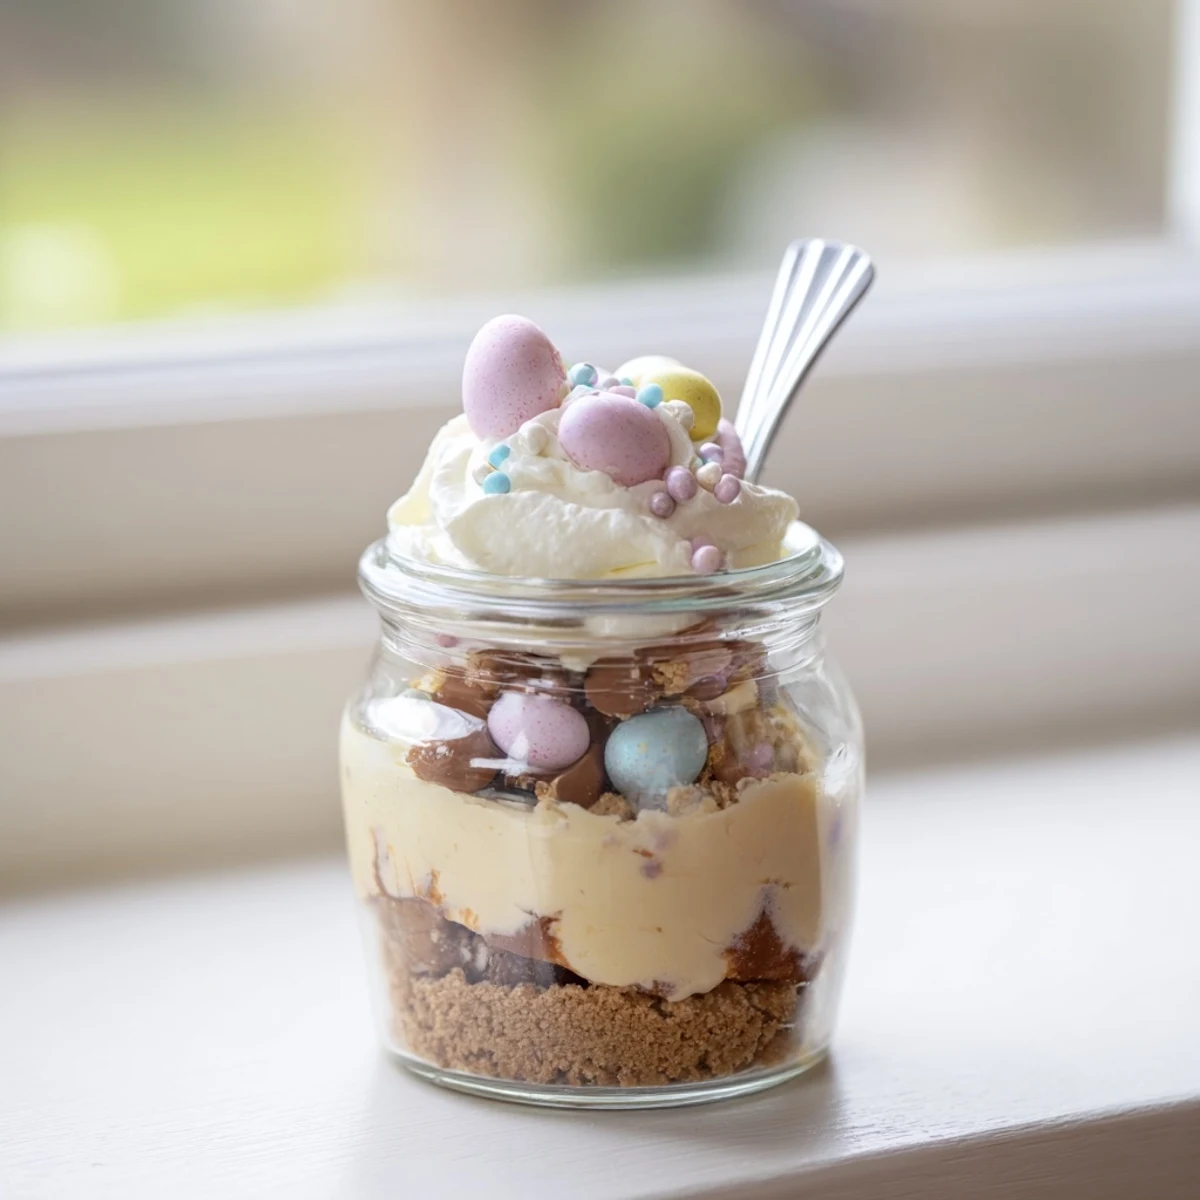
 These individual cheesecake jars feature a buttery cookie crust layered with velvety smooth cream cheese filling and surprise mini chocolate eggs tucked inside. The no-bake preparation makes them perfect for Easter entertaining, while the portable jar presentation adds a whimsical touch to your dessert table. Each creamy bite reveals the hidden chocolate treasures, making them especially delightful for children and adults alike.
The idea hit me while grocery shopping in early April, surrounded by pastel candy displays that seemed to mock my usual baking failures. I'd never made cheesecake before, something about water baths and cracks always intimidated me. But these individual jars felt forgiving, like I could hide my mistakes under layers of whipped cream. Now they're the one Easter dessert I actually look forward to making.
My sister-in-law asked for the recipe after Easter brunch last year, watching her kids light up when they bit into the hidden chocolate. I'd rushed the assembly that morning, still in pajamas, but the jars looked professional on the table. Sometimes the simplest desserts make the biggest impression on people who expect complicated holiday baking.
Ingredients
- 1 cup digestive biscuits or graham crackers: crushed into fine crumbs, these create the foundation that reminds everyone of classic cheesecake
- 3 tbsp unsalted butter: melted and stirred through the crumbs to bind them into that buttery crust we all love
- 8 oz cream cheese: absolutely must be softened to room temperature or you'll fight lumps forever
- 1/3 cup granulated sugar: just enough sweetness without overpowering the tangy cream cheese
- 1 tsp vanilla extract: pure vanilla makes all the difference in this simple filling
- 1 cup heavy cream: whipped separately, this is what makes the cheesecake impossibly light and mousse-like
- 18 mini chocolate Easter eggs: solid eggs work best for hiding throughout the layers
- 1/2 cup whipped cream: for those fluffy tops that make everyone smile before they even dig in
- 2 tbsp rainbow sprinkles: or pastel sugar pearls if you want something more elegant
Instructions
- Build the cookie crust:
- Combine the crushed biscuits with melted butter in a medium bowl, stirring until every crumb looks evenly coated and moistened. Spoon about two tablespoons into the bottom of each jar and press down gently with the back of your spoon to create an even foundation.
- Make the fluffy cheesecake filling:
- Beat the softened cream cheese, sugar, and vanilla until completely smooth, taking your time to scrape down the bowl. In a separate bowl, whip the cold heavy cream until stiff peaks form, then gently fold it into the cream cheese mixture until no white streaks remain.
- Layer with hidden surprises:
- Spoon cheesecake filling over each crust until jars are half full, then press two or three mini Easter eggs into the layer. Add more filling to cover the eggs completely, smoothing the tops with a small offset spatula or the back of a spoon.
- Chill until set:
- Refrigerate the jars for at least two hours, though overnight is even better for the flavors to develop. The filling should feel firm and hold its shape when you gently shake the jars.
- Add the finishing touches:
- Top each jar with a swirl of whipped cream right before serving, then arrange a few extra Easter eggs on top and finish with sprinkles that catch the light.
 Bookmark
 Last year my niece discovered the first hidden egg and her eyes went wide, like I'd performed actual magic instead of just layered ingredients in a jar. She proceeded to eat hers with exaggerated care, hunting for each chocolate treasure like it was buried gold. That's the moment these went from just another dessert to an Easter tradition.
Making Them Ahead
I've learned through experience that these jars are actually better when made the day before. The crust softens slightly, the cheesecake firms up perfectly, and all the flavors have time to get friendly with each other. Plus, having dessert done before the holiday madness begins feels like winning some secret kitchen game.
Choosing Your Jars
Clear glass is non-negotiable here because the whole point is seeing those colorful layers and hidden eggs through the sides. I use eight-ounce mason jars, but any small glass vessel works as long as you can see what's inside. Wide-mouthed jars make assembly so much easier, trust me on this one.
Getting Creative With Variations
Once you master the basic version, these jars become a canvas for whatever Easter candy speaks to you. Peanut butter cups, chocolate bunnies chopped into pieces, or even fruity peeps for the adventurous souls among us. The base recipe is forgiving enough to handle almost any candy substitution you dream up.
- Try chocolate sandwich cookies for the crust if you want a deeper cocoa flavor
- Lemon curd swirled into the filling cuts through all that richness beautifully
- Keep some plain jars handy for anyone who might not want the hidden chocolate surprise
 Bookmark
 These cheesecake jars have become the dessert I actually get excited about instead of stressing over. Sometimes the simplest ideas are the ones that stick around year after year.
Recipe FAQs
- → How long do these need to chill before serving?
-
The jars require at least 2 hours in the refrigerator to set properly. For the best texture and flavor, you can chill them overnight. They can be prepared up to 24 hours in advance, making them ideal for make-ahead Easter entertaining.
- → Can I use different types of cookies for the crust?
-
Absolutely! While digestive biscuits or graham crackers work beautifully, you can experiment with chocolate sandwich cookies, vanilla wafers, or even shortbread cookies for different flavor profiles. Chocolate cookies add a rich twist that pairs wonderfully with the cream cheese filling.
- → What size jars work best for this dessert?
-
Small glass jars holding 6-8 ounces each are ideal. This allows for perfect layering of crust, cheesecake filling, and hidden eggs. Mason jars, repurposed jam jars, or any clear glass containers with tight-fitting lids work wonderfully for presentation and storage.
- → Can I make these without an electric mixer?
-
Yes, you can use a whisk and some elbow grease to whip the heavy cream and combine the cream cheese mixture. The filling may take slightly longer to reach the desired fluffy consistency, but the final result will be just as delicious.
- → How should I store leftovers?
-
Keep any remaining jars tightly covered in the refrigerator for up to 3-4 days. The crust may soften slightly over time, but the flavors will continue to develop. Bring chilled jars to room temperature for about 10 minutes before serving for the creamiest texture.
- → Can I adapt this for different holidays?
-
Certainly! Simply swap the chocolate eggs for other seasonal candies— candy corn for Halloween, red and green chocolates for Christmas, or heart-shaped treats for Valentine's Day. The basic concept works beautifully year-round with your favorite festive additions.
