 Bookmark
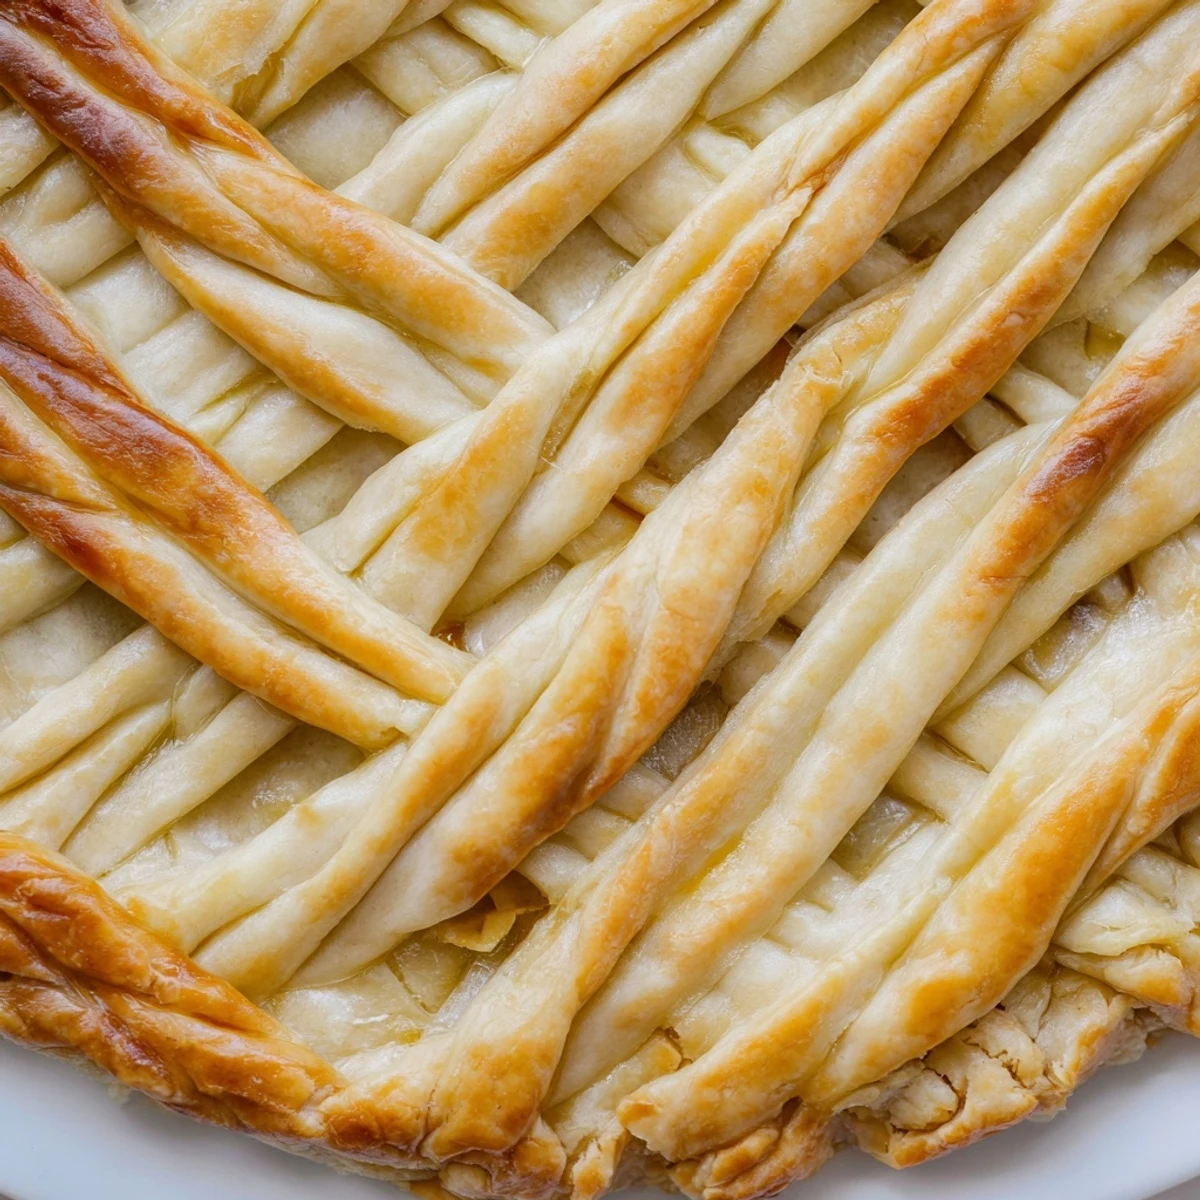
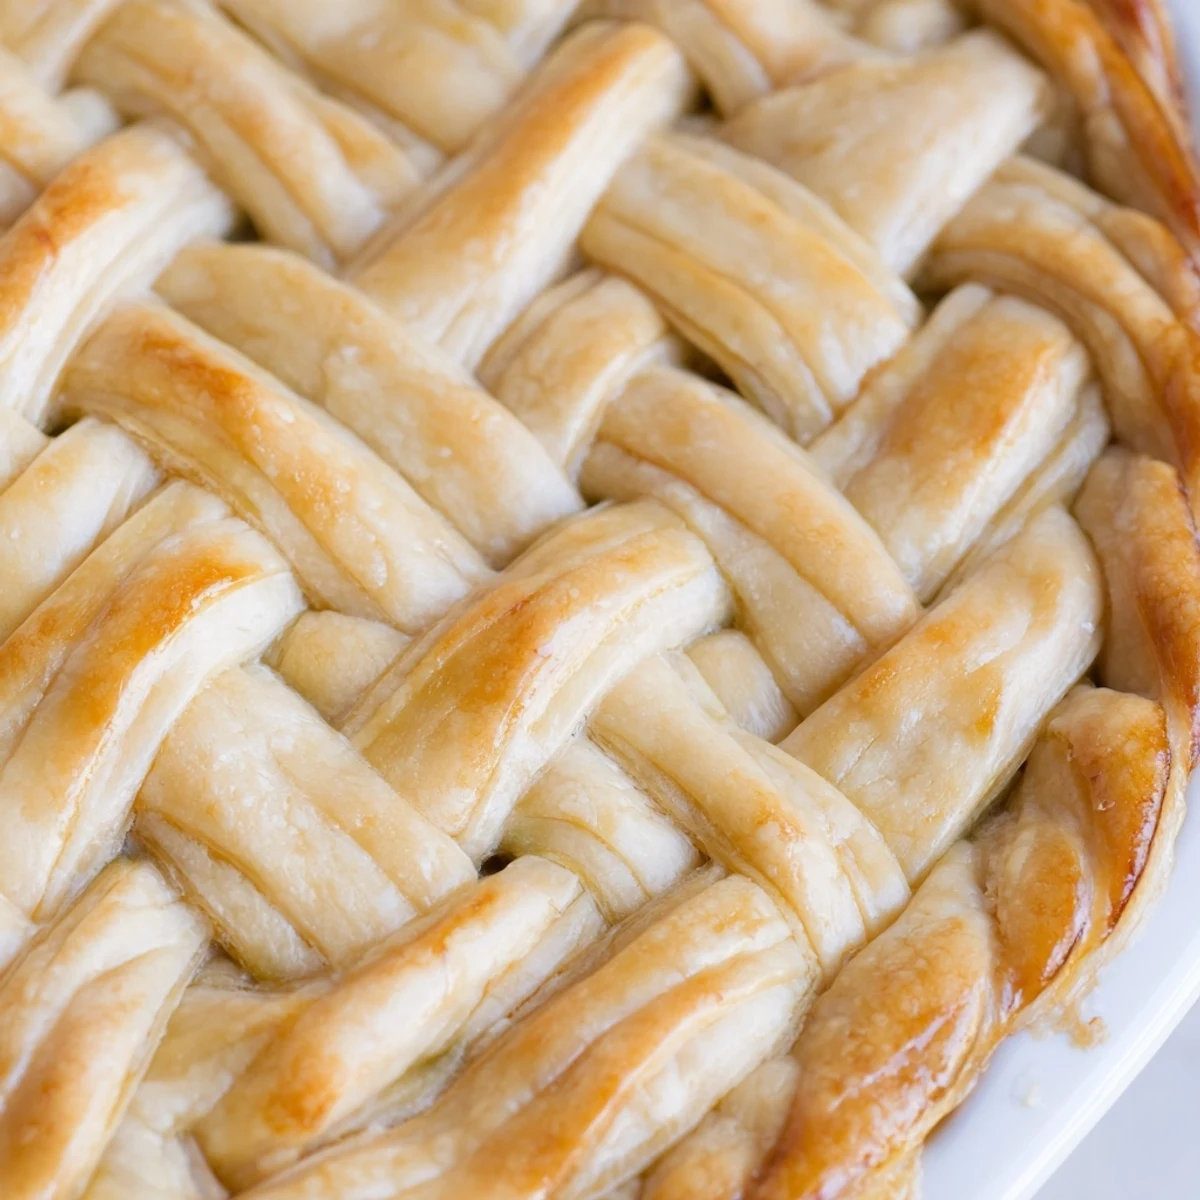
 This decorative crust technique transforms ordinary pies into stunning centerpieces. The fishtail braid creates an intricate woven border that looks professionally crafted but is entirely achievable at home. Start with a classic butter-based dough, roll it into even strips, then weave using the fishtail method for that distinctive herringbone pattern. The result is a golden, flaky crown that adds both visual appeal and delightful texture to fruit pies, quiches, or savory pot pies.
Keep your dough chilled throughout the process for clean cuts and easy handling. The egg wash creates that irresistible bakery shine, while the braided edge bakes up beautifully crisp. Perfect for holidays, dinner parties, or whenever you want to elevate your baking presentation.
The first time I attempted a fishtail braid on a pie crust, my kitchen looked like a flour bomb had gone off. I was making an apple pie for my sister's birthday and wanted something that would make her do a double take. After three attempts and some very creative language, I finally got the hang of it. Now there is something deeply satisfying about turning plain dough into something that looks like it came from a fancy bakery window.
I brought this braided peach pie to a summer potluck last year, and honestly, it felt like showing off. My friend Sarah asked if I had secretly taken a pastry masterclass. We sat on her back porch eating warm slices with vanilla ice cream, and I admitted that the fancy crust was actually easier than it looked. Now every time she invites me over, she asks if the braided beauty is coming along.
Ingredients
- 2 1/2 cups all-purpose flour: The foundation of everything, and keeping some extra nearby for dusting saves so much frustration
- 1 cup cold unsalted butter: Cold butter is the secret to flaky layers, so do not let it sit out while you are gathering other ingredients
- 1 tsp salt: Even sweet pies need a pinch of salt to make the flavors pop
- 1 tbsp sugar: Totally optional, but I add it for fruit pies because that subtle sweetness balances everything
- 1/4 to 1/2 cup ice water: Add it gradually, because too much water makes tough dough and too little makes it fall apart
- 1 egg beaten with 1 tbsp milk: This egg wash gives your braid that gorgeous golden shine that catches everyone's eye
Instructions
- Make your dough base:
- Whisk the flour, salt, and sugar in a large bowl, then work in those cold butter cubes with a pastry cutter or your fingers until you see pea-sized chunks scattered throughout.
- Add ice water gradually:
- Sprinkle in the water starting with just 1/4 cup, gently mixing until the dough holds together when you squeeze it, then divide into two disks and chill for at least an hour.
- Roll and cut strips:
- On a floured surface, roll one disk into a rectangle about 1/8 inch thick, then cut at least six even strips about 12 inches long and 1/2 inch wide using a ruler and knife.
- Create the fishtail braid:
- Lay three strips together with pressed ends, start with one regular braid stitch, then cross the outer right strip to center followed by outer left to center, repeating until complete.
- Apply and bake:
- Brush your filled pie edge with water, gently position your braid around the rim, brush with egg wash, and bake at 375°F for 12 to 15 minutes until perfectly golden.
 Bookmark
 My niece watched me make this once and said it looked like I was weaving magic. She sat at the counter absolutely mesmerized as the strips intertwined into something that looked impossibly fancy. Now whenever she visits, she asks if we can make the pretty pie together, and honestly, I love having a tiny kitchen assistant who thinks my floury mess is actually art.
Making The Strips Even
I used to eyeball my strips and end up with some that were chubby and others that were sad and skinny. Then I started using a ruler and pizza cutter, which sounds ridiculously precise but makes such a difference. Uniform strips braid more evenly and hold their shape better during baking, so take the extra minute to measure.
Working With Colored Dough
One of my favorite experiments involved mixing pureed roasted beets into half my dough for a stunning red and white braid. Spinach gives you green, turmeric yields yellow, and suddenly your pie crust becomes a conversation starter. Just remember that colored dough can be slightly stickier, so keep your work surface well floured.
Savory Variations
Sometimes I add dried herbs like thyme or rosemary directly into the flour mixture for savory pies, and the aroma while it bakes is absolutely incredible. A braided crust on a chicken pot pie feels so homey and special, like something from a grandmother who actually had time to make everything beautiful.
- Try adding grated parmesan to the dough for an extra savory punch
- Brush with herb infused olive oil instead of egg wash for a different finish
- Sprinkle everything bagel seasoning on top before baking for fun texture
 Bookmark
 There is something so joyful about making food look as good as it tastes, and this braided crust never fails to make me smile. Hope it brings a little extra beauty to your table too.
Recipe FAQs
- → How do I keep the braided strips from breaking?
-
Keep your dough thoroughly chilled throughout the rolling and cutting process. Work quickly and handle the strips minimally. If the dough becomes too warm or sticky, place it in the refrigerator for 10-15 minutes before continuing. Cold butter creates flaky layers and prevents the strips from losing their shape.
- → Can I make the braids ahead of time?
-
Absolutely. You can prepare the braided strips up to 24 hours in advance. Wrap them carefully in plastic and refrigerate. When ready to use, let them sit at room temperature for just a few minutes so they become pliable enough to shape around your pie edge without cracking.
- → What fillings work best with this decorative crust?
-
The fishtail braid beautifully complements both sweet and savory creations. Fruit fillings like apple, cherry, or berry allow the golden braid to shine. Savory options like chicken pot pie, vegetable quiches, or shepherd's pie benefit equally from the decorative finish. The braid adds structure and elegance to any style.
- → Do I need to blind bake this crust?
-
It depends on your filling. For fruit pies or other fillings that require extended baking, simply apply the braid and bake everything together. For cream pies, custards, or no-bake fillings, blind bake the crust with the braid at 375°F for 12-15 minutes until golden, then add your cooled filling afterward.
- → Can I add color or flavor variations to the braids?
-
Certainly. Incorporate herbs like rosemary or thyme for savory pies, or cinnamon and sugar for sweet versions. For visual impact, mix in pureed vegetables like spinach, beets, or turmeric to create colorful dough strips. These additions make the braid even more striking while adding subtle flavor dimensions.
- → How many strips do I need for one pie?
-
For a standard 9-inch pie, plan on cutting at least 6 strips that are 12 inches long and ½ inch wide. This typically yields two to three fishtail braids, depending on their length, which should comfortably encircle your pie's edge with a stunning decorative border.
