 Bookmark
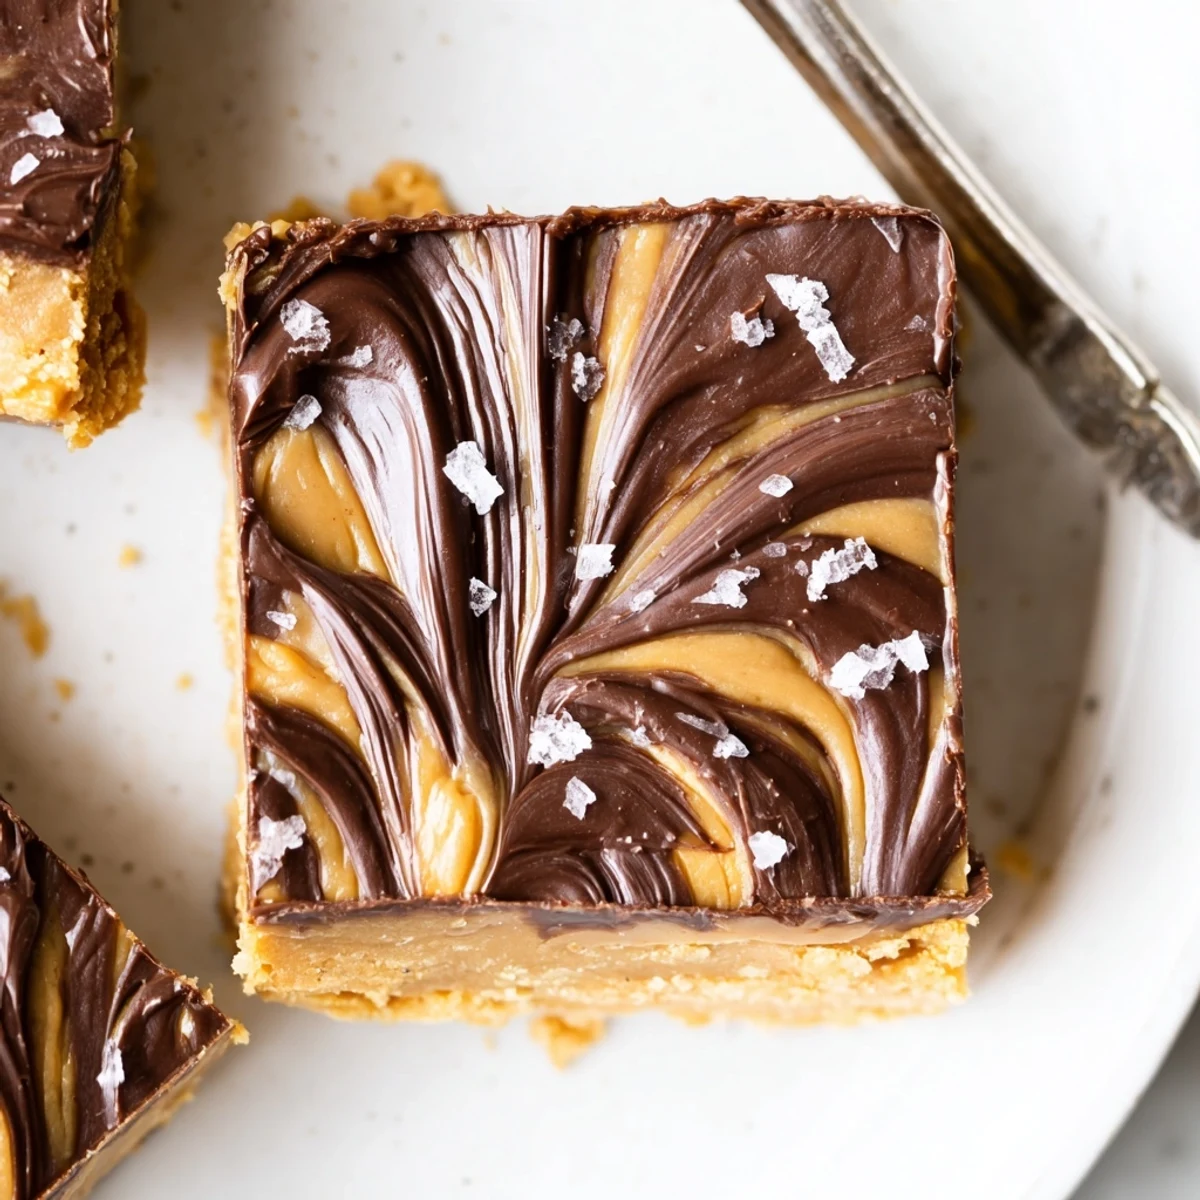
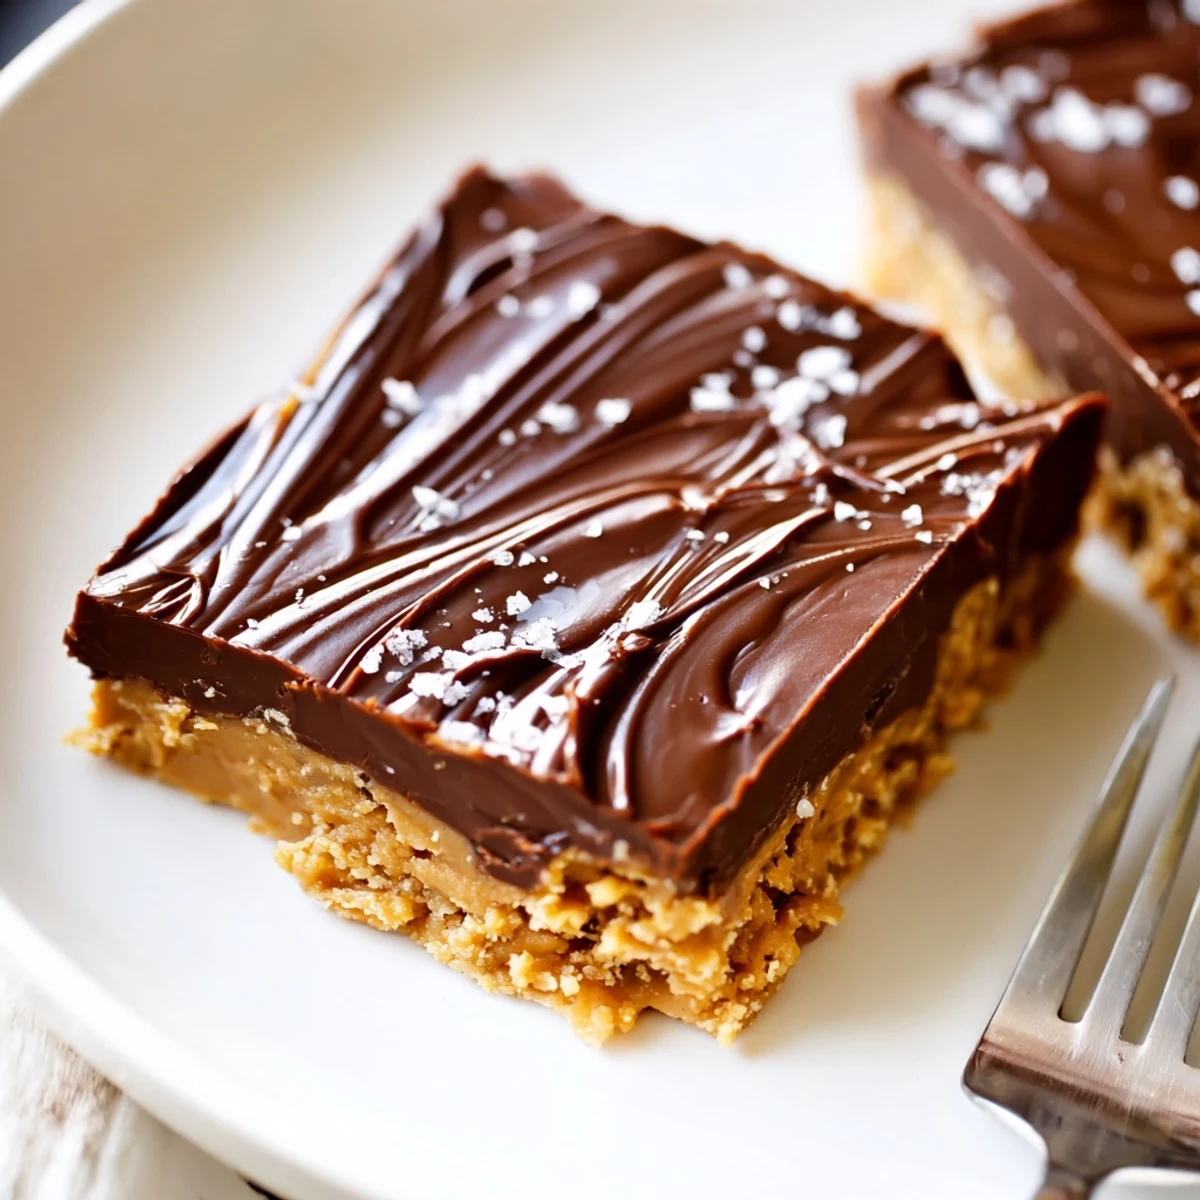
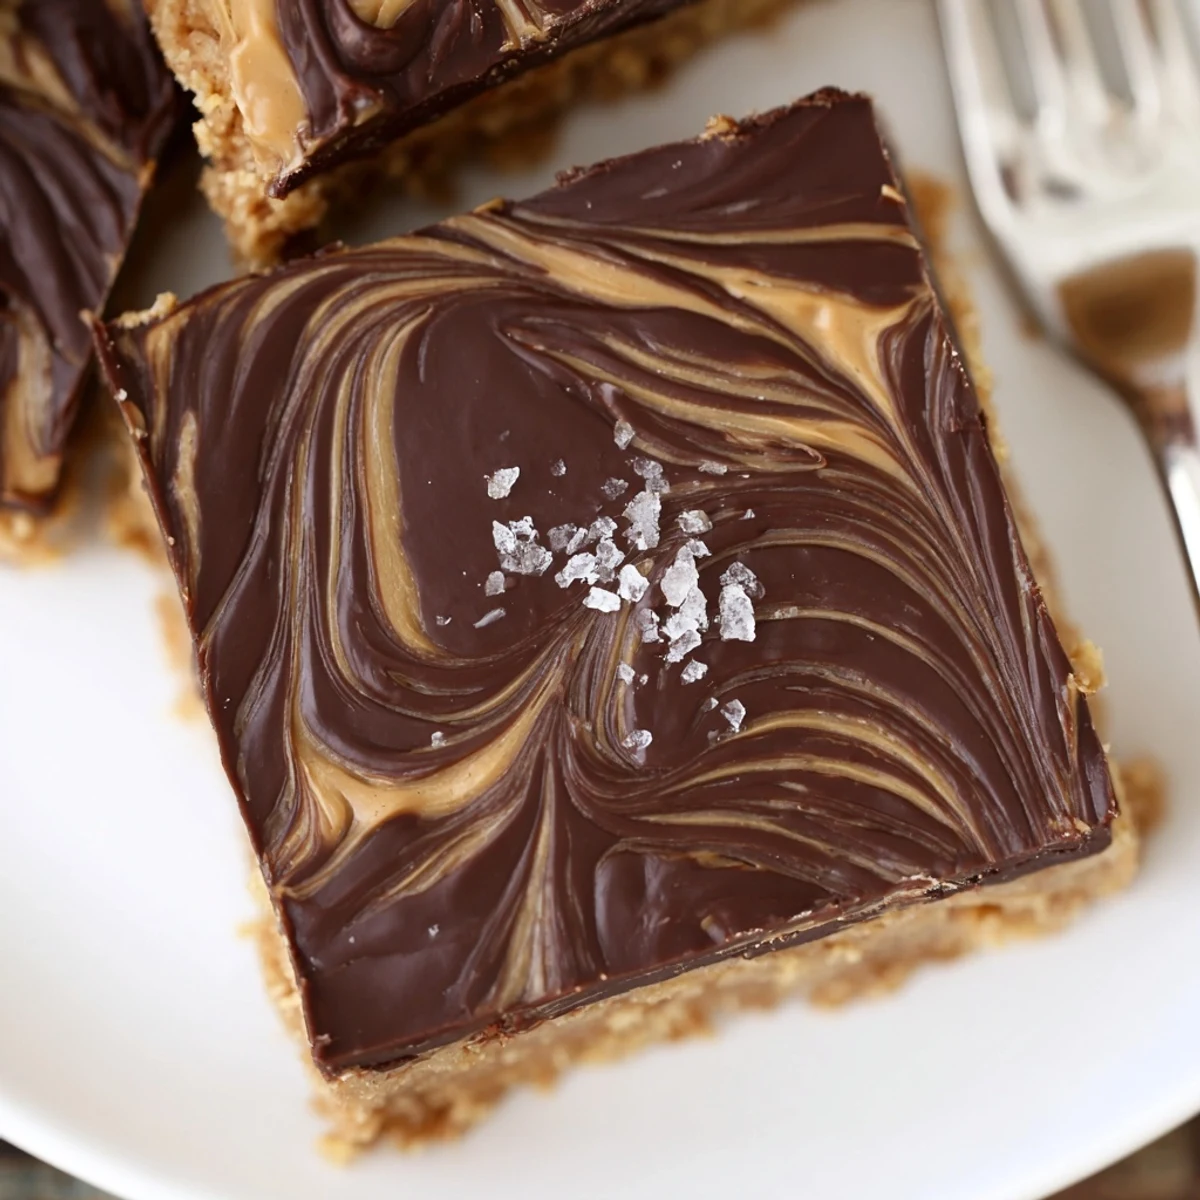
 Combine melted butter and creamy peanut butter, then stir in powdered sugar, graham cracker crumbs, and vanilla to form a thick dough. Press into an 8×8 in pan, melt semi-sweet chocolate with a little peanut butter for a glossy topping, spread over the base, and refrigerate at least 2 hours until set. Lift out with parchment, cut into 16 bars. Options: chunky peanut butter, chopped peanuts, gluten-free crumbs, or a pinch of sea salt on top.
The satisfying sound of graham crackers crunching in the food processor always cues a good afternoon ahead. I once made these No Bake Peanut Butter Bars with music blaring and windows open, letting the aroma of peanut butter linger with spring air. There’s something about pressing that thick, peanutty dough into a pan and not having to turn on the oven—almost a mischievous way to bake. The whole process feels more like assembling than actual cooking, which leaves plenty of room for spontaneous kitchen dance moves.
These bars made their debut when my best friend dropped by unannounced for coffee and a catch-up—I pulled the chilled pan from the fridge, sliced a few squares, and we both counted it as the highlight of our afternoon. Watching her eyes light up on that first bite is the reason I always keep graham crackers and peanut butter stocked. Sharing sticky fingers and melted chocolate smudges felt like a return to childhood, where dessert was the real reason to linger at the kitchen table.
Ingredients
- Creamy peanut butter: The star that brings richness and binds all the layers—make sure it’s well-stirred for even texture, and don’t be shy about licking the spoon.
- Unsalted butter (melted): Adds silkiness and helps the base set perfectly; microwave in short bursts to avoid splattering everywhere.
- Powdered sugar: Blends in smoothly, dissolving into the mixture while lending just the right sweetness.
- Graham cracker crumbs (or digestive biscuit crumbs): Give the base a subtle crunch and classic flavor; press them finely for bar stability.
- Vanilla extract: Just a splash deepens the flavor and cuts through the sweetness with a toasty note.
- Semi-sweet chocolate chips: Melt smoothly and strike a lovely bittersweet balance against all the richness.
- Extra creamy peanut butter (for topping): Swirled with chocolate to create a glossy, luscious top—no need to measure perfectly.
Instructions
- Prepare the pan:
- Line an 8x8 inch pan with parchment, leaving a generous overhang. This little trick ensures the bars lift out without a wrestling match.
- Mix the base:
- Combine melted butter and peanut butter in a big bowl. Stir until glossy, then slowly fold in the powdered sugar and graham cracker crumbs—watch the mixture transform into thick, sticky dough and fold in the vanilla.
- Press it in:
- Scoop the peanut butter mixture into your pan and use a spatula to firmly press and even out the top. It always seems impossible to get it perfectly flat, but those rustic swirls are part of the charm.
- Make the topping:
- Melt chocolate chips with peanut butter in a microwave-safe bowl, pausing every 30 seconds to stir until silky smooth. Pour over the base and nudge it into every corner for an even, glossy layer.
- Chill to set:
- Pop the whole pan into the fridge and resist peeking for at least two hours—patience is the hardest step. When chilled and set, lift out by the parchment and use a sharp knife to cut into 16 squares.
- Serve and enjoy:
- Share straight from the fridge so the bars keep their shape, or let them sit a minute if you prefer a softer bite (and a little chocolate on your fingers).
 Bookmark
 The real magic happened the first time I brought these to a potluck—watching the plate empty before dinner was even served reminded me how a simple treat can start laughter and conversation. That sticky, sweet aroma wafting through the room was as inviting as a warm hug.
Making Them Your Own
I’m convinced these bars are a blank canvas for your pantry whims—add chopped salted peanuts for crunch, a sprinkle of flaky sea salt, or swap in gluten-free cookies if that’s what you have. One friend drizzled extra chocolate over the top in zig-zags, and it looked like something from a fancy bakery without a speck of extra effort.
Ideal Times to Serve
They’re my go-to for sunny park picnics, lazy Sunday brunches, or last-minute office parties when no one expects homemade treats. Their no-bake nature means you won’t heat up the kitchen, and they hold their shape even after an afternoon out.
Troubleshooting and Last Touches
The bars occasionally stick, but running a sharp knife around the pan edge before lifting with the parchment saves the day. If the topping looks dull, a touch of melted butter stirred in brings back the shine. Don’t fret over perfect squares—uneven pieces somehow taste better.
- Store in an airtight container to keep them from getting stale.
- Let stand a few minutes before serving for easy slicing.
- A pinch of sea salt on top takes their flavor to the next level.
 Bookmark
 These No Bake Peanut Butter Bars are the kind of treat that make simple gatherings feel special. You might want to hide a square or two before sharing—they disappear fast.
Recipe FAQs
- → How long should I chill until fully set?
-
Refrigerate for a minimum of 2 hours; for firmer bars chill 3–4 hours. Chilling solidifies the base and sets the chocolate topping for clean slices.
- → Can I use natural peanut butter?
-
Yes, but natural peanut butter can be oilier and softer. Whisk well and consider adding a tablespoon more powdered sugar or extra graham crumbs to achieve a firm dough.
- → What's the best way to melt the chocolate topping?
-
Microwave in 20–30 second bursts, stirring between intervals until smooth, or use a double boiler over gentle simmering water. Stir in the 1/4 cup peanut butter for shine and stability.
- → How can I make these gluten-free?
-
Swap graham cracker crumbs for certified gluten-free cookie crumbs or oat-based crumbs. Ensure all other ingredients are labeled gluten-free to avoid cross-contamination.
- → How should leftovers be stored?
-
Keep bars in an airtight container in the refrigerator for up to one week. For longer storage, freeze individually wrapped bars for up to 2 months; thaw in the fridge before serving.
- → Any tips for extra texture or flavor?
-
Fold in chopped roasted peanuts or use chunky peanut butter for crunch. A light sprinkle of flaky sea salt on the chocolate layer brightens the flavors.
