 Bookmark
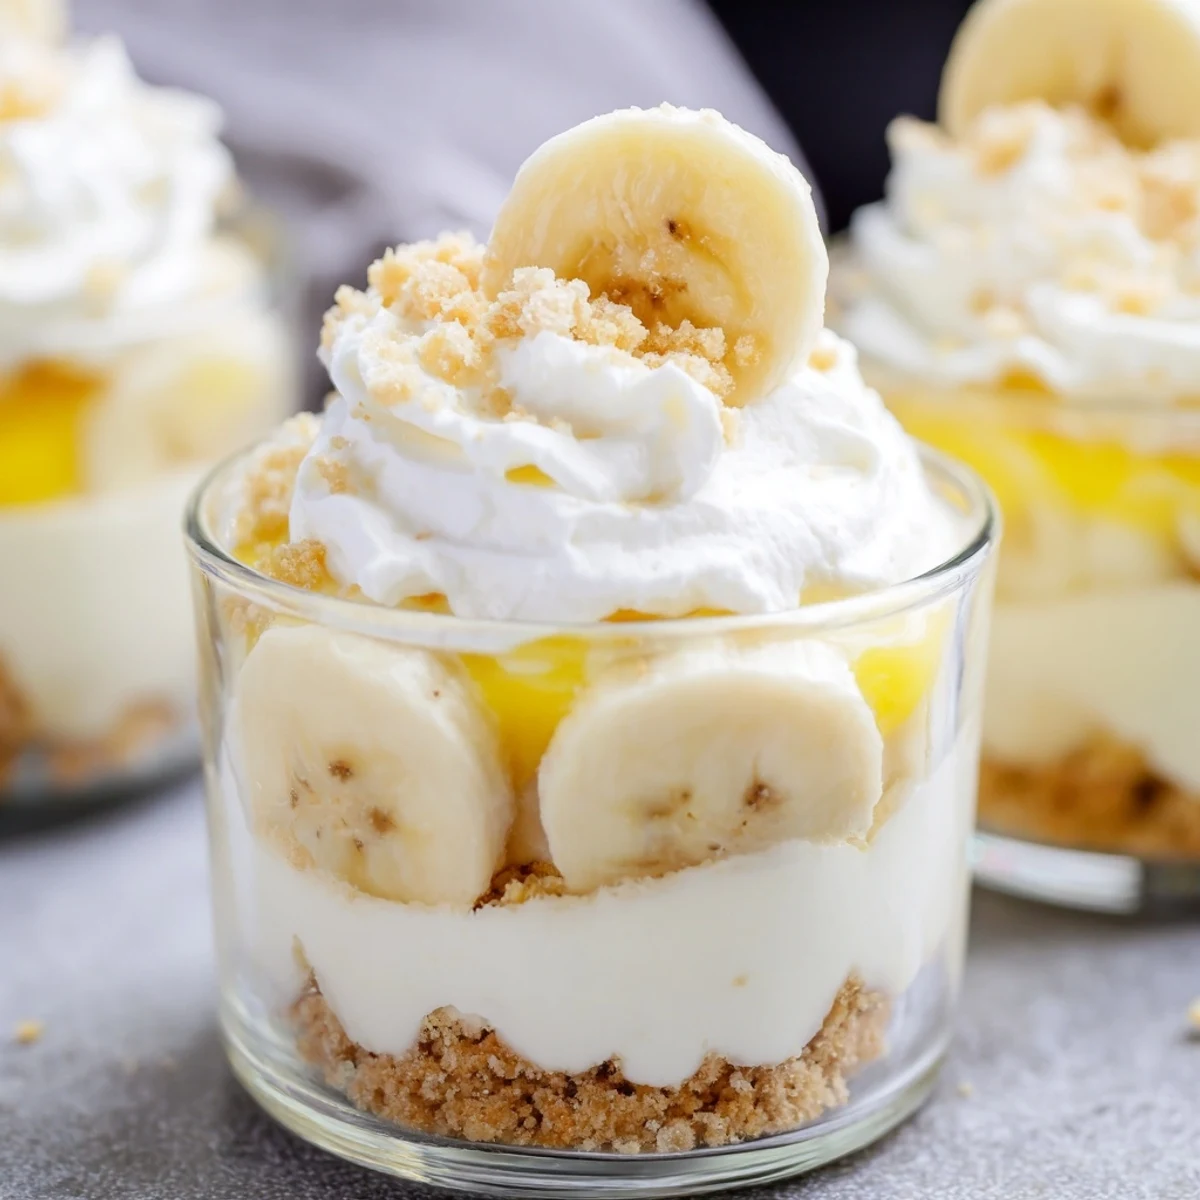
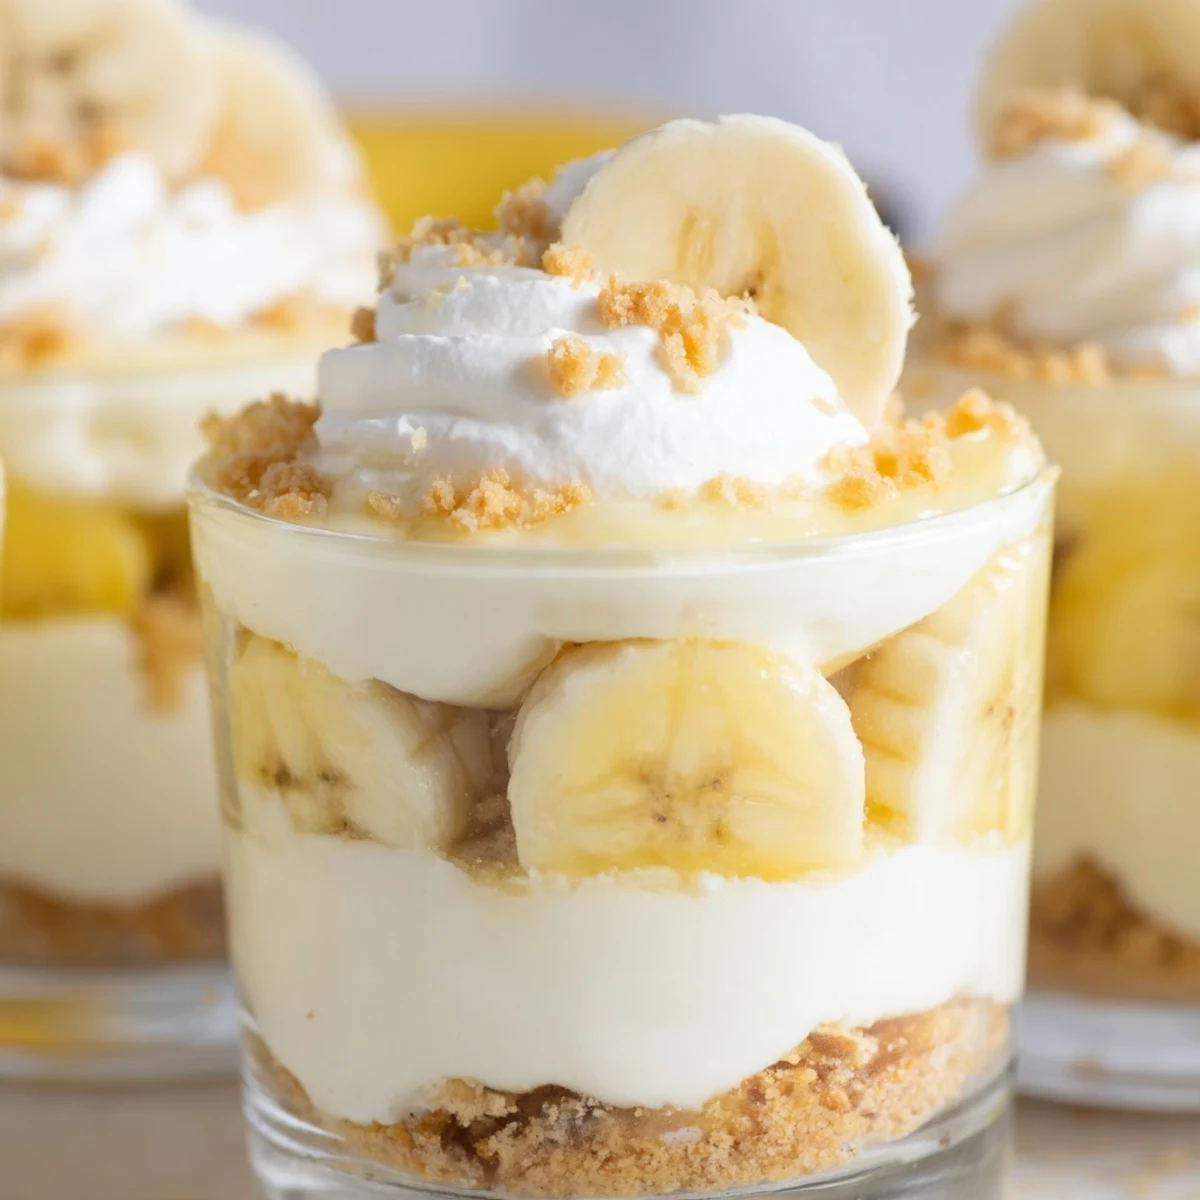
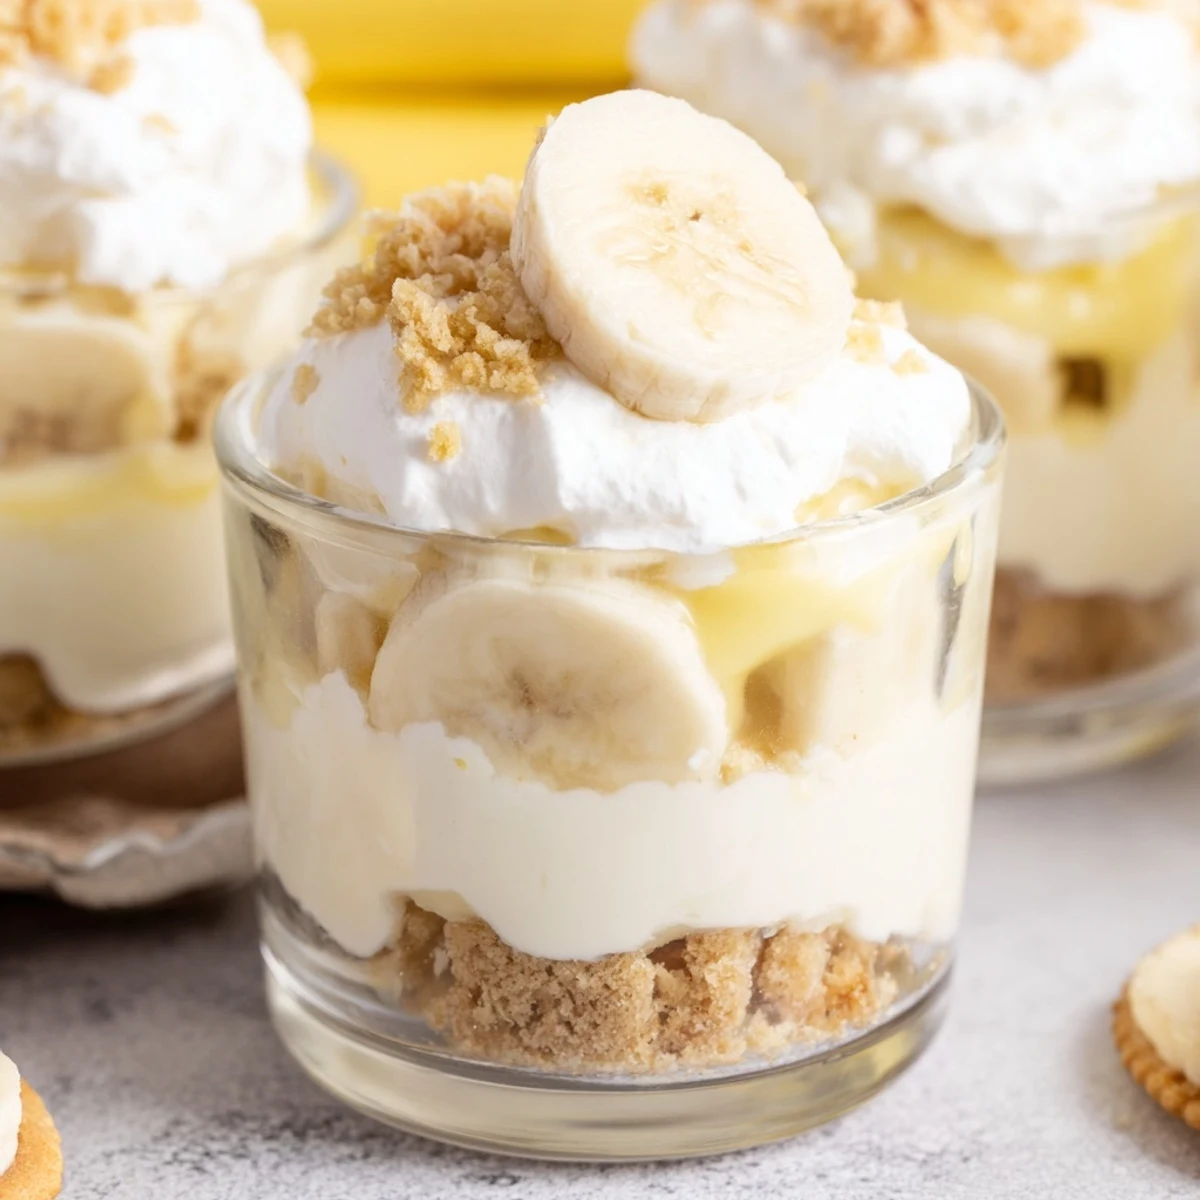
 These individual no-bake cups combine the best of banana pudding and creamy cheesecake in one adorable dessert. A crunchy vanilla wafer crust forms the base, followed by velvety cheesecake filling, fresh banana slices, and classic banana pudding layers. Each cup is topped with whipped cream, more bananas, and buttery crumb topping for the perfect bite every time.
Ready in just 20 minutes active time, these cups need at least 2 hours to chill and set. They're perfect for parties, potlucks, or whenever you want an impressive dessert without turning on the oven. Make them up to 24 hours ahead and add fresh toppings just before serving.
The afternoon I discovered I could make something this impressive without turning on my oven felt like unlocking a secret level in cooking. My tiny apartment kitchen was already sweltering, and yet I'd promised to bring dessert to a friend's patio gathering that evening. These cups ended up stealing the show, with everyone convinced I'd spent hours hovering over a stove.
Last summer I made these for my niece's birthday, and she actually asked if I could teach her how to make them. We stood side by side in the kitchen, her hands covered in wafer crumbs, laughing when we both reached for the same spoon. Those are the moments that stick with you far longer than the recipe itself.
Ingredients
- 1 cup vanilla wafer cookies, crushed: These nostalgic wafers provide the perfect buttery crunch that anchors each creamy layer
- 2 tbsp unsalted butter, melted: Binds the crust together and adds that rich, golden flavor
- 8 oz cream cheese, softened: Make sure it's truly room temperature to avoid any lumps in your filling
- 1/3 cup granulated sugar: Just enough sweetness to balance the tanginess without being cloying
- 1 tsp pure vanilla extract: Pure vanilla makes a noticeable difference here
- 1 cup heavy whipping cream, cold: The secret to making the cheesecake layer impossibly light and airy
- 1 package instant banana pudding mix: Speeds up the process while delivering that classic banana flavor
- 1 1/4 cups cold whole milk: Cold milk is essential for the pudding to set properly
- 2 ripe bananas, sliced: Look for bananas with plenty of brown spots for maximum sweetness
Instructions
- Build the buttery crust foundation:
- The sandcastle moment of the recipe, press the crumb mixture firmly but gently into each cup
- Whip up the cheesecake cloud:
- Beat that cream cheese until it's silky smooth, then fold in the whipped cream like you're handling something precious
- Prepare the banana pudding magic:
- Whisk vigorously for exactly two minutes, watching it transform from liquid into luscious pudding
- Layer with love and patience:
- Spoon each layer deliberately, letting them settle before adding the next, creating those beautiful distinct stripes
- Finish with the perfect crowns:
- Scatter extra crumbs, arrange fresh banana slices like little fans, and add that final cloud of whipped cream
- Exercise restraint and refrigerate:
- Tuck them away for at least two hours, letting all those flavors become best friends in the cold
 Bookmark
 There's something almost meditative about assembling these cups, watching the layers build up through the glass. My grandmother would have adored making these with me, probably sneaking extra banana slices when she thought I wasn't looking.
Mastering the Art of Layering
I learned the hard way that rushing the layering process leads to muddy, blended cups instead of those gorgeous distinct stripes. Take your time with each layer, letting it settle before adding the next one. The visual payoff is worth every extra minute of patience.
Keeping Bananas Fresh and Golden
Bananas have an annoying habit of turning brown once they're sliced, but a quick toss in lemon juice before adding them to your cups keeps them looking fresh for hours. It's the tiny details that transform these from good to absolutely stunning.
Making Ahead Like a Pro
The beauty of this recipe is that it actually improves with a little time in the refrigerator. You can assemble everything except the final fresh banana topping up to 24 hours ahead, then add those perfect slices just before serving for maximum freshness.
- Always use a light hand when pressing the crust
- Room temperature ingredients blend more smoothly
- Chill your serving cups beforehand for extra stability
 Bookmark
 Every time I serve these, someone asks for the recipe, shocked when I tell them there's absolutely no baking required. That's the kind of dessert victory worth celebrating.
Recipe FAQs
- → Can I make these cups ahead of time?
-
Yes! These cups can be prepared up to 24 hours in advance. Store them covered in the refrigerator and add fresh banana slices and whipped cream just before serving to prevent browning.
- → How do I prevent the bananas from turning brown?
-
Toss sliced bananas lightly in lemon juice before layering to slow oxidation. You can also add banana slices right before serving. The pudding layer also helps protect bananas from air exposure.
- → Can I use homemade banana pudding instead of instant?
-
Absolutely! Homemade vanilla or banana pudding works beautifully. Just ensure it's fully cooled and thickened before layering. You may need to adjust chilling time slightly.
- → What size cups work best for this dessert?
-
Use 6-8 ounce ramekins, mason jars, or clear dessert cups. Clear glass works especially well so you can see the beautiful layers. Six cups should accommodate all the filling.
- → Can I freeze these cheesecake cups?
-
Not recommended. The texture of the pudding and fresh bananas doesn't freeze well. These are best enjoyed fresh within 1-2 days of preparation.
- → What can I substitute for vanilla wafers?
-
Graham cracker crumbs, vanilla sandwich cookies, or digestive biscuits work well as crust alternatives. For a gluten-free option, use certified GF vanilla cookies or GF graham crackers.
